There are no items in your cart
Add More
Add More
| Item Details | Price | ||
|---|---|---|---|

Google Cloud Platform (GCP): Complete Operations & Management Guide (2026)
Account Creation, Project Management, API Activation, Billing Control, Support & Resource Deletion
Published: Wed Jul 29, 2026
Whether you are starting out with Google Cloud Platform (GCP) or managing cloud workloads for production, knowing how to navigate the Google Cloud Console efficiently is mandatory. Proper administration ensures smooth deployment, security compliance, and prevents unexpected billing charges.
In this comprehensive guide, we will cover the 7 essential lifecycle operations in GCP updated for 2026:
In cloud platforms, resources like Virtual Machines, Kubernetes Clusters, Load Balancers, and Storage Buckets incur charges as long as they exist. Simply closing your browser or unlinking billing will not delete running instances automatically. Following proper shutdown procedures protects your wallet and keeps your cloud environment clean.
Setting up your GCP account is simple and gives you $300 in free trial credits valid for 90 days.
💡 Looking for full step-by-step account creation details? For each and every detailed step, visit our official guide: GCP Account Creation Guide (Get $300 Credits).
In Google Cloud, a Project is the fundamental container for organizing all your cloud resources (VMs, databases, networks). Every resource must belong to a project.
Log in to the Google Cloud Console. In the top navigation bar, click on the Select a Project dropdown menu next to the Google Cloud logo.
In the project selector modal that appears, click the NEW PROJECT button in the top-right corner.
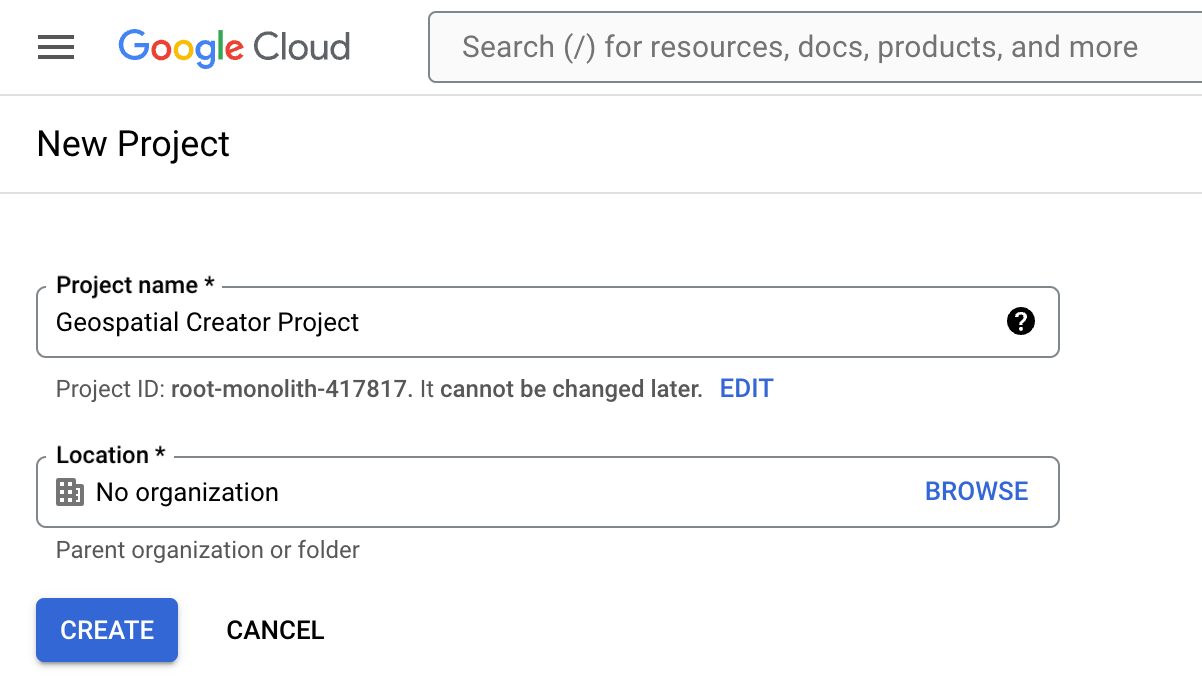
Enter a unique Project Name. GCP will generate a unique Project ID. Select your Organization and Location/Folder if applicable, then click CREATE.
Once created, select your new project from the top dropdown to start working inside it.
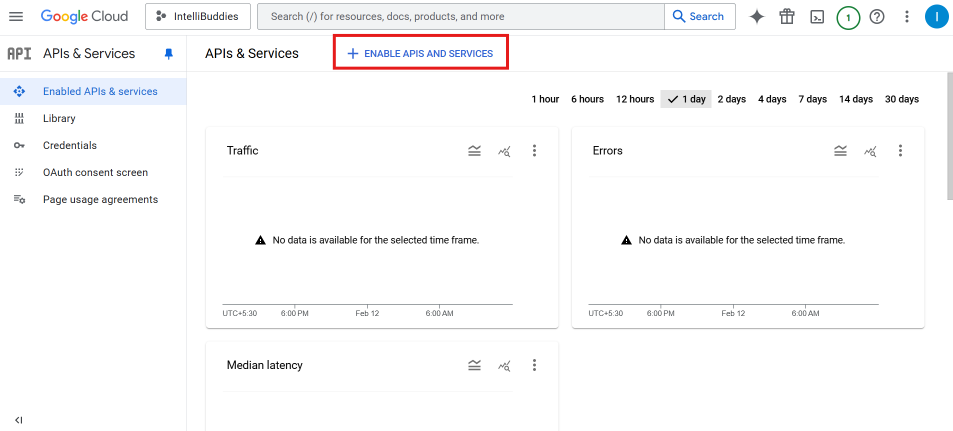
By default, most Google Cloud APIs are disabled for security and cost control. Before using services like Compute Engine, Cloud Run, or Kubernetes Engine, you must enable their respective APIs.
Open the Navigation Menu (☰) in the top-left corner → Hover over APIs & Services → Click Library.
Type the name of the service (e.g., Compute Engine API or Google Kubernetes Engine API) in the search bar. Click on the API card from the results, then click the blue ENABLE button.
When you no longer need a project, shutting it down deletes all associated resources and releases project IDs.
Shutting down a project marks it for permanent deletion after a 30-day grace period. During these 30 days, billing stops, but you can restore the project if needed.
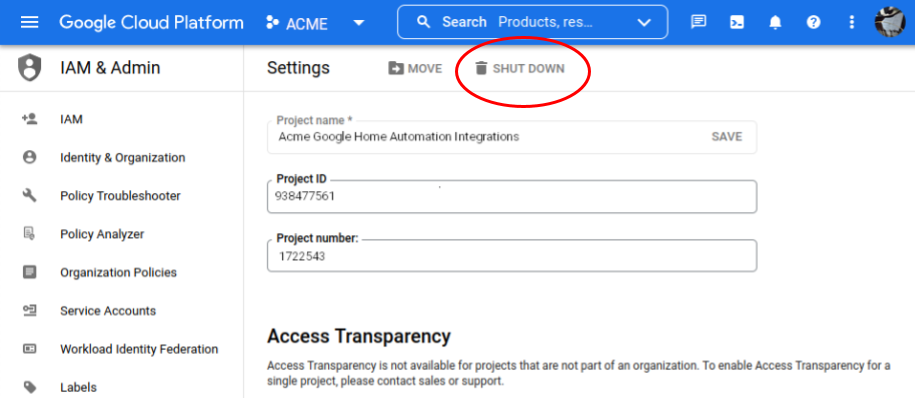
Open the Navigation Menu (☰) → Go to IAM & Admin → Click Settings (or Project Settings).
Click the SHUT DOWN button on the top toolbar. Type your Project ID in the prompt box to confirm ownership, then click SHUT DOWN.
If you want to stop all paid services on a project immediately without deleting the project itself, you can disable billing by unlinking the Billing Account.
Open the Navigation Menu (☰) → Click Billing. Select your active Billing Account if prompted.
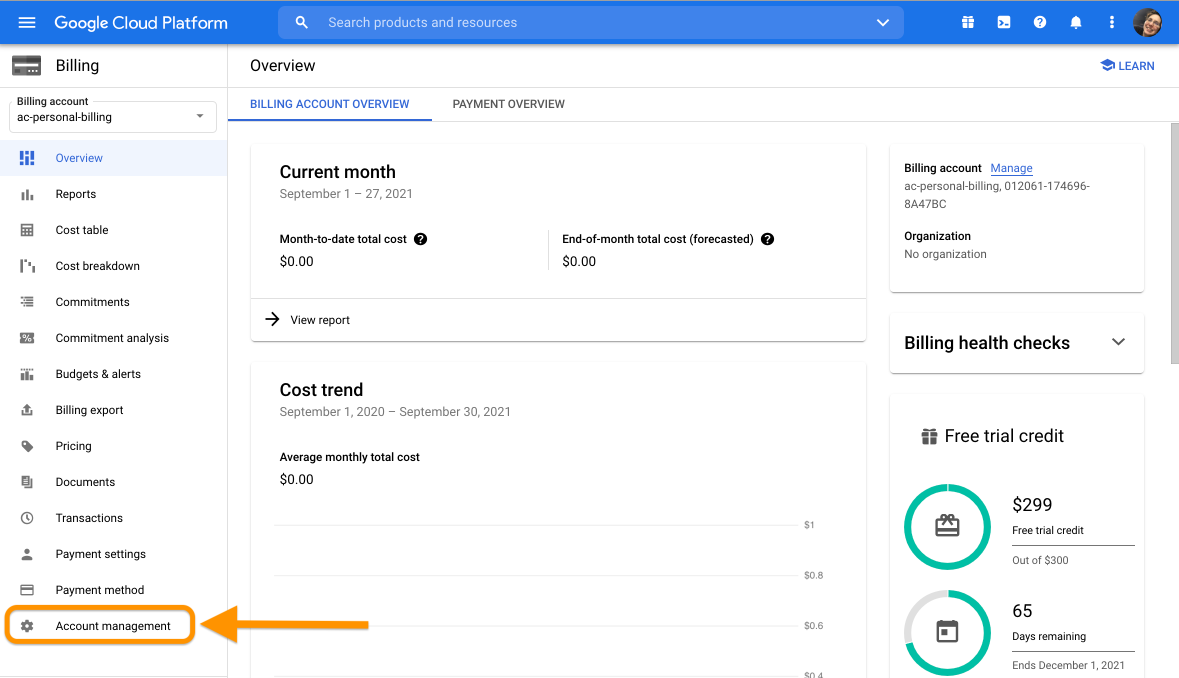
In the left sidebar, click Account Management. Locate your project under the Projects linked to this billing account table. Click the three vertical dots (⋮) next to the project and select Disable billing (or Change billing account → UNLINK ACCOUNT).
If you encounter technical issues, billing queries, or quota limit questions, GCP provides dedicated support channels directly in the console.
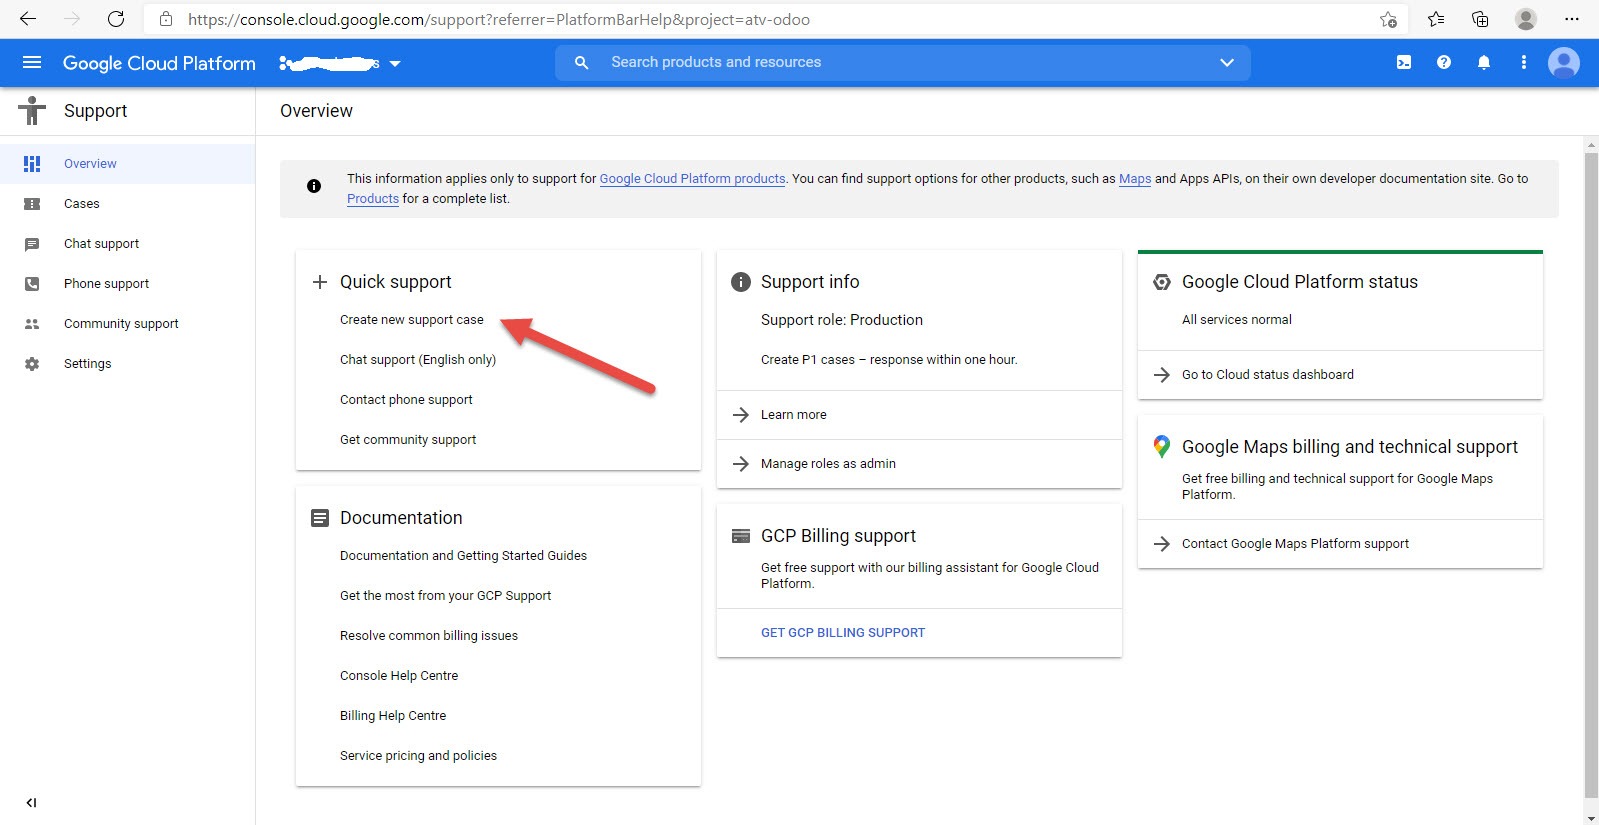
Click the Help (?) icon in the top header bar of the Cloud Console, or open the Navigation Menu (☰) and select Support.
In the Support dashboard, click Cases or CREATE CASE. Choose your issue category (Billing, Technical, Account Access), provide a title and detailed description, attach any log screenshots, and click SUBMIT.
One of the biggest mistakes cloud learners make is shutting down a project or unlinking billing without explicitly terminating active resources first. This can lock resources or keep hidden billable items active.
Before closing any project, manually clean up the following core services:
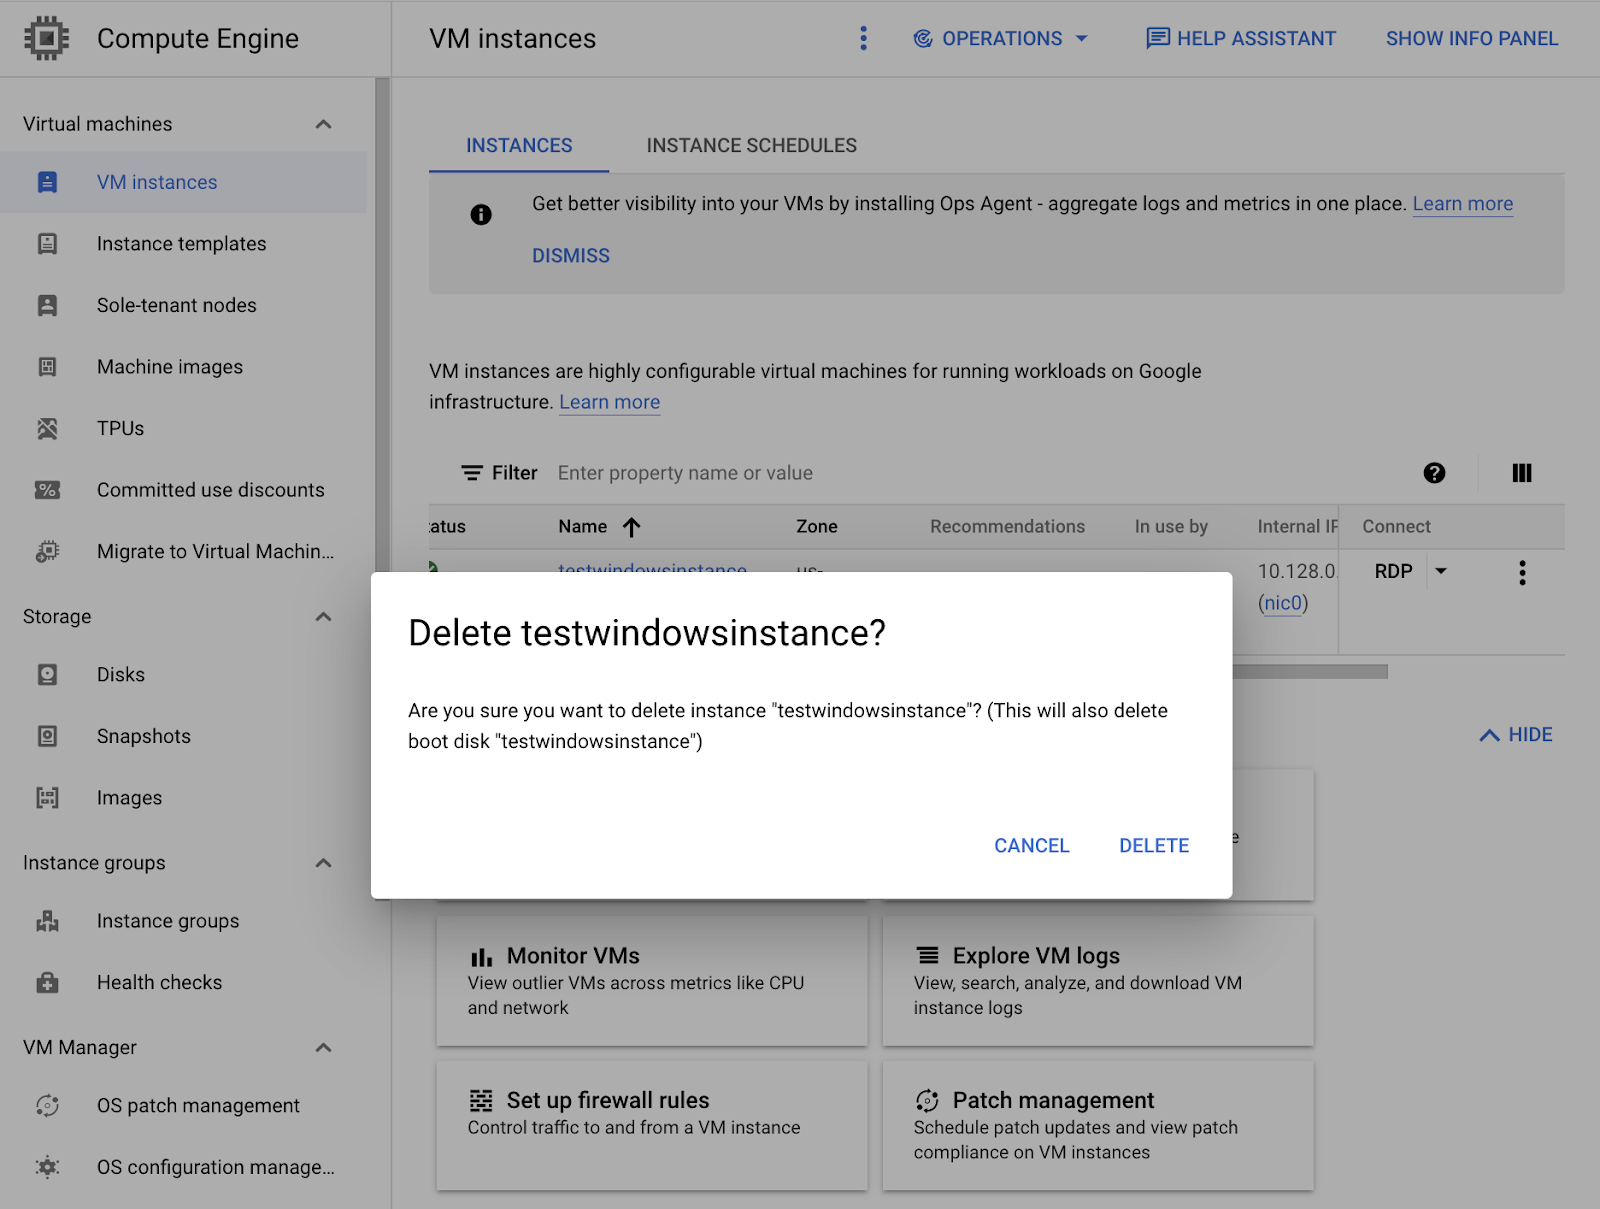
Navigate to Compute Engine → VM instances, check the box next to your active virtual machine, click DELETE on the top action bar, and confirm the deletion prompt.