If you're learning DevOps, Cloud, or Kubernetes, a Google Cloud Platform (GCP) account is one of the first things you need — and the good news is Google gives every new user $300 in free credits, valid for 90 days, just to explore the platform. In this guide, I'll walk you through the exact steps to create your GCP account, verify it, and get it ready for hands-on practice — the same setup I ask students to complete before our live Kubernetes sessions.
Why You Need This Free Trial
$300 might not sound like much, but for learning purposes it goes a long way. It's enough to:
- Spin up a Kubernetes cluster on GKE (Google Kubernetes Engine) and practice deployments
- Launch a few Compute Engine VMs to get comfortable with Linux on the cloud
- Try Cloud Run for deploying containerized apps without managing servers
- Experiment with VPCs, load balancers, and IAM roles — the networking and security basics every cloud engineer needs
As long as you keep an eye on usage, you can genuinely build 2–3 solid portfolio projects on this free tier alone.
Prerequisites
Before starting, make sure you have:
- A Google (Gmail) account
- A valid Debit/Credit Card or UPI (available in supported regions)
- A mobile number for verification
- Internet connection
Step-by-Step: Creating Your GCP Account
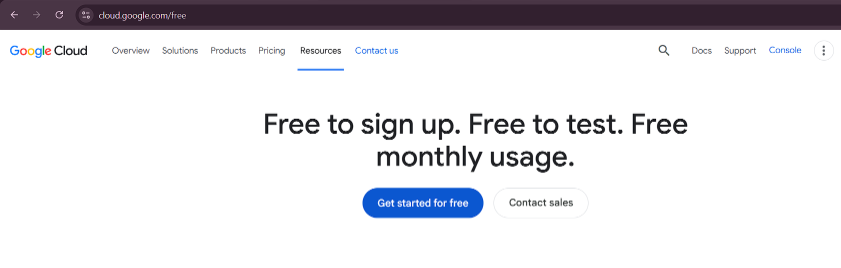
1 Open the Google Cloud Free Tier Page
Visit the official Google Cloud Free Tier page: cloud.google.com/free
You will see the Google Cloud landing page with information about the Free Trial, Free Tier services, and a Get started for free button.
2 Click on "Get Started for Free"
Click the Get started for free button.
If you are not already signed in, Google will ask you to log in using your Gmail account. Once signed in, you will be redirected to the account creation page.
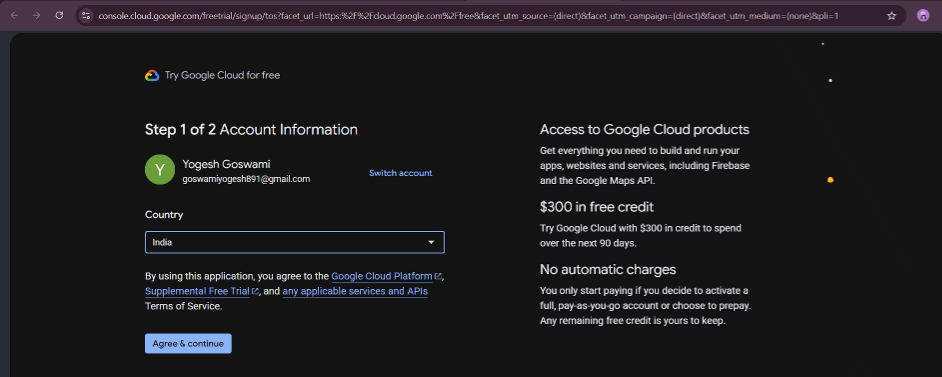
3 Select Your Country and Accept the Terms
On the Account Information page:
- Verify your Google account.
- Select your Country.
- Read the Google Cloud Platform Terms of Service.
- Click Agree & Continue.
4 Don't Create Organization Account
If you see a checkbox asking if you are creating an organization account, untick the checkbox if you are creating this for personal learning.
5 Enter Your Contact Information
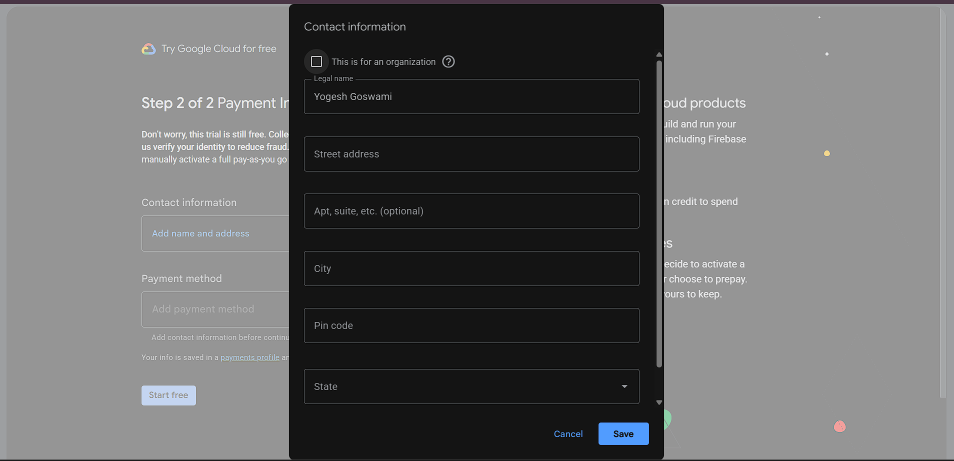
Google will now ask you to complete your billing profile. Fill in the following details:
- Legal Name
- Street Address
- Apartment/Suite (Optional)
- City
- PIN Code
- State
If you're creating the account for personal learning, leave "This is for an organization" unchecked.
After entering all the information, click Save.
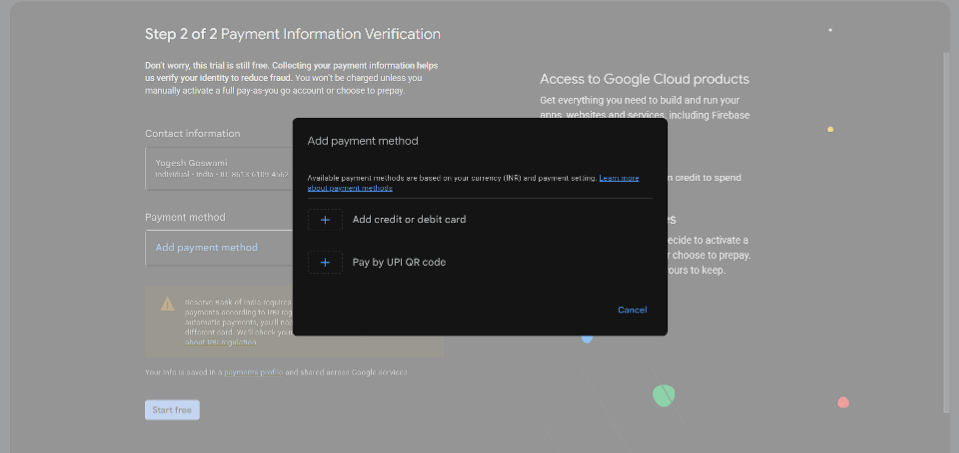
6 Add a Payment Method
After saving your contact information, click Add Payment Method.
Depending on your country, you may see options such as:
- Credit Card (International transaction need to be enabled)
- Debit Card (International transaction need to be enabled)
- UPI QR Code (India) (15k Mandate will be required )
Choose your preferred payment method.
7 Complete Payment Verification
Google requires payment verification to confirm your identity and prevent fraudulent account creation.
- Enter your payment details.
- Complete the verification process.
- In some cases, Google may temporarily authorize a small amount on your card. This amount is generally reversed automatically according to your bank's policies.
Note: You won't be charged unless you manually upgrade to a Pay-as-you-go account or exceed the Free Tier limits after the trial.
8 Start Your Free Trial
Once your payment method is successfully verified:
- The Start Free button will become active.
- Click Start Free to activate your Google Cloud Free Trial.
Your account setup will now begin.
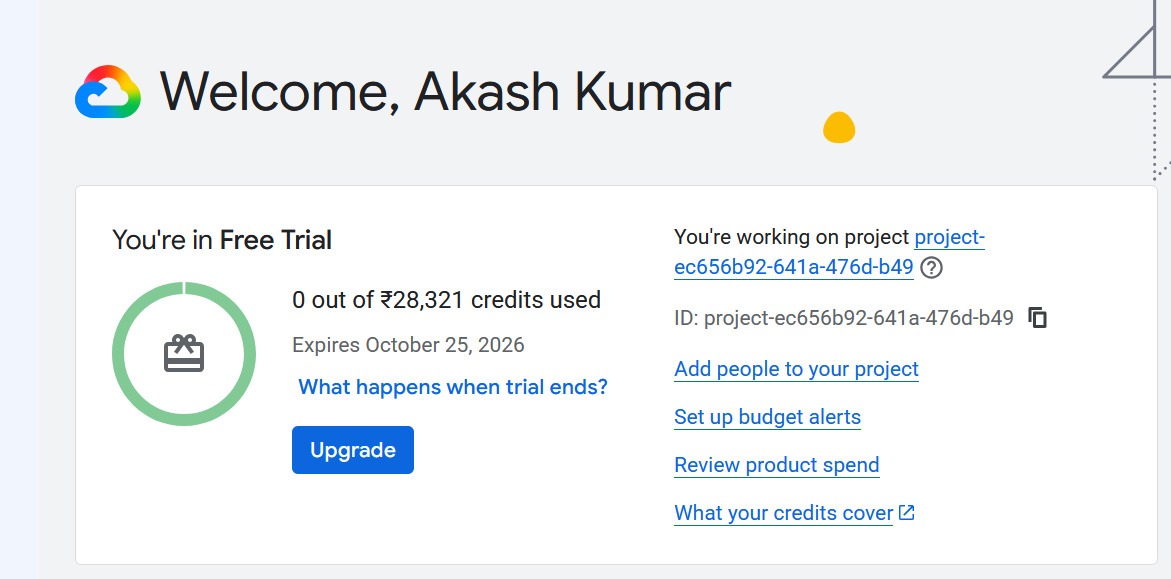
9 Access the Google Cloud Console
After successful verification, you'll be redirected to the Google Cloud Console.
From here, you can:
- Create Virtual Machines
- Deploy Applications
- Use Cloud Storage
- Create Kubernetes Clusters
- Explore AI & Machine Learning Services
- Use BigQuery, Cloud Functions, Cloud Run, and many other Google Cloud services
Congratulations! Your Google Cloud Free Tier account is now ready to use.
What to Do Right After Setup
Once your account and console access are ready, don't just leave it sitting there. A good first move:
- Enable the Compute Engine and Kubernetes Engine APIs
- Create your first VM instance and SSH into it
- Explore the IAM & Admin section to understand roles and permissions
- Set your budget alert (seriously, do this before anything else)
Important Things to Know Before You Start Building
- Google won't auto-charge you during the trial. You stay on the free tier unless you manually upgrade to a paid account. No surprise bills.
- Track your usage. Go to Billing → Overview in the console regularly to see how much of your $300 you've used.
- Set up Budgets & Alerts. Under Billing → Budgets & Alerts, set a threshold (say, $50 or $100) so Google emails you if you're approaching it. This isn't just a trial-account habit — it's a real production best practice. Every cloud engineer sets budget alerts, even on company accounts.
- Shut down resources you're not using. VMs and clusters cost money even when idle. If you spin up a GKE cluster for practice, delete it once you're done for the day.
- Free Tier usage limits still apply even after the trial credits expire.
👤
Vikas Ratnawat
From CloudDevOpsHub