There are no items in your cart
Add More
Add More
| Item Details | Price | ||
|---|---|---|---|

How to Launch Your First Virtual Machine (EC2 Instance) on AWS
A Complete DevOps Visual Guide: AMIs, Instance Sizing, Key Pairs, Deep-Dive Security Groups & Multi-Method SSH Connection
Amazon Elastic Compute Cloud (Amazon EC2) is the industry-standard compute engine powering millions of global applications. EC2 provides resizable compute capacity in the cloud, allowing developers and DevOps engineers to deploy virtual servers in under 60 seconds.
In this visual guide, you will learn step-by-step how to launch an EC2 instance, generate secure key pairs, configure Security Group Inbound & Outbound rules, and connect directly using EC2 Instance Connect.
t2.micro).t2.micro instances for 12 months).us-east-1 (N. Virginia)).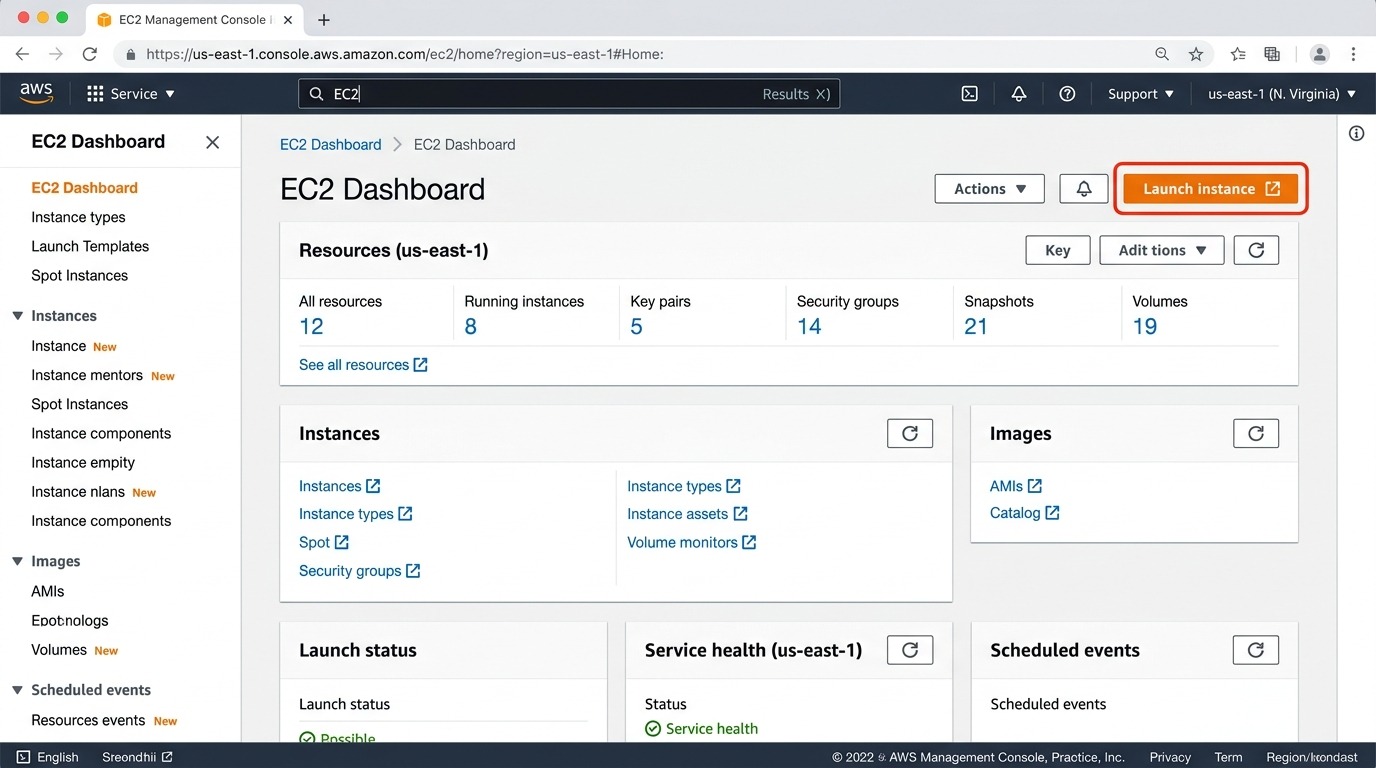
Figure 1: AWS Management Console — Navigating to EC2 Dashboard and clicking the orange 'Launch instance' button.
devops-web-server-01 in the Name and tags field.t2.micro (1 vCPU, 1 GiB Memory, Free tier eligible).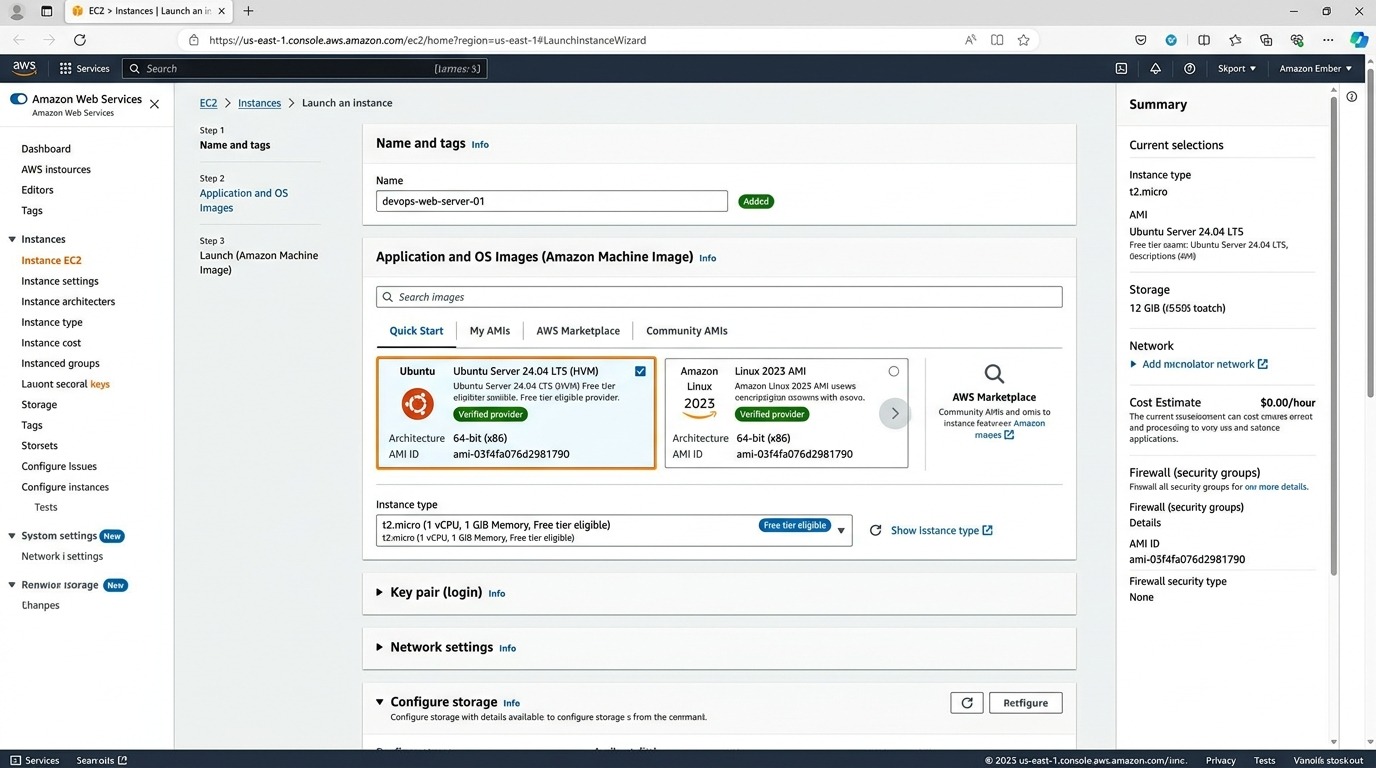
Figure 2: Setting Instance Name, selecting Ubuntu 24.04 LTS AMI, and choosing the t2.micro Free tier eligible instance type.
A Security Group acts as a stateful virtual firewall that controls inbound and outbound network traffic to your EC2 instance.
my-devops-key.pem) or click Create new key pair.My IP (Restricts terminal access to your IP address)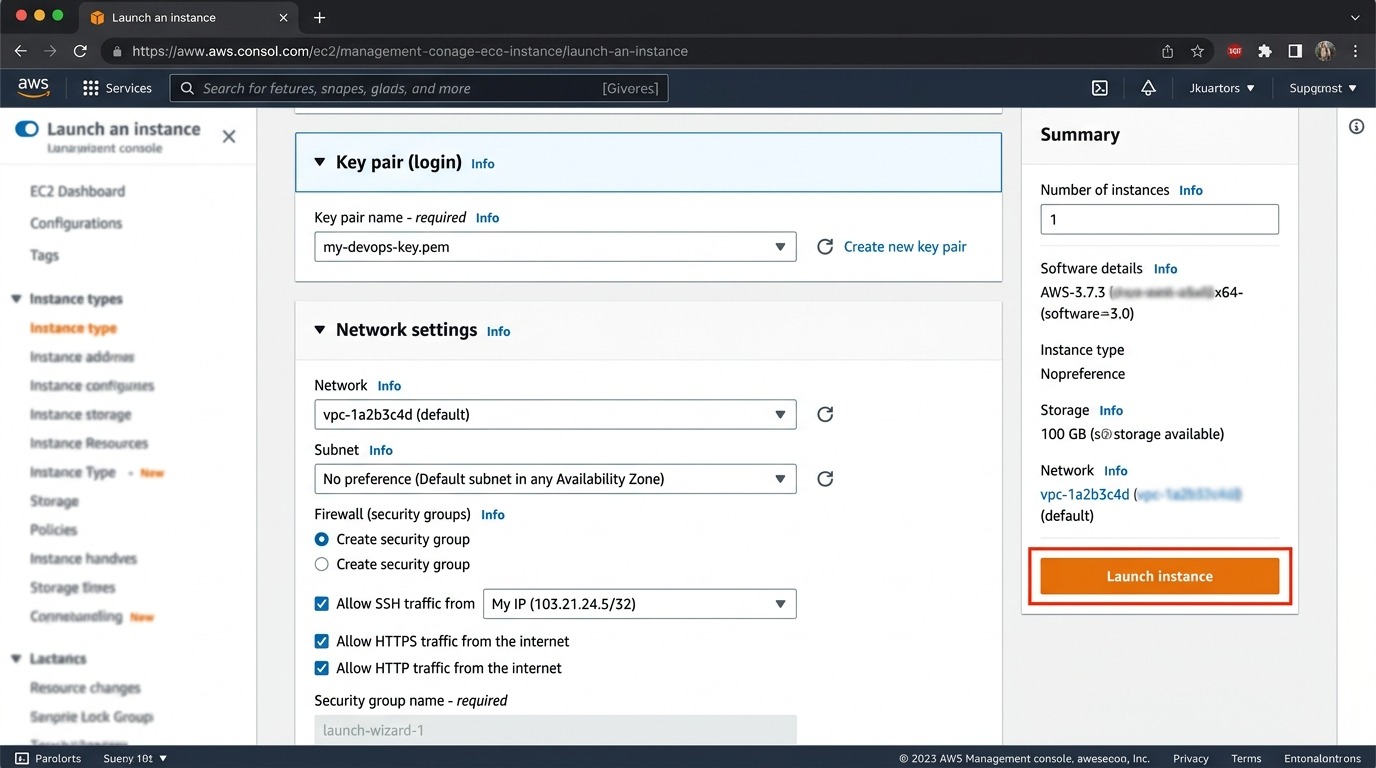
Figure 3: Configuring Key Pair (.pem) and Security Group Inbound Firewall rules (SSH Port 22, HTTP Port 80, HTTPS Port 443).
| Type | Protocol | Port Range | Source (CIDR) | Security Recommendation |
|---|---|---|---|---|
| SSH | TCP | 22 | My IP / 32 |
Restrict to My IP to prevent unauthorized brute-force attempts. |
| HTTP | TCP | 80 | 0.0.0.0/0 |
Allows standard public web traffic to reach your web server. |
| HTTPS | TCP | 443 | 0.0.0.0/0 |
Allows encrypted SSL/TLS web traffic. |
| Custom TCP | TCP | 8080 / 3000 | 0.0.0.0/0 |
For Node.js, Spring Boot, Jenkins, or Docker container applications. |
Navigate to EC2 > Instances. Select your instance devops-web-server-01. Check that Instance state displays ✔ Running with 2/2 status checks passed, and note your assigned Public IPv4 address (e.g. 54.210.88.142).
Click the highlighted Connect button at the top.
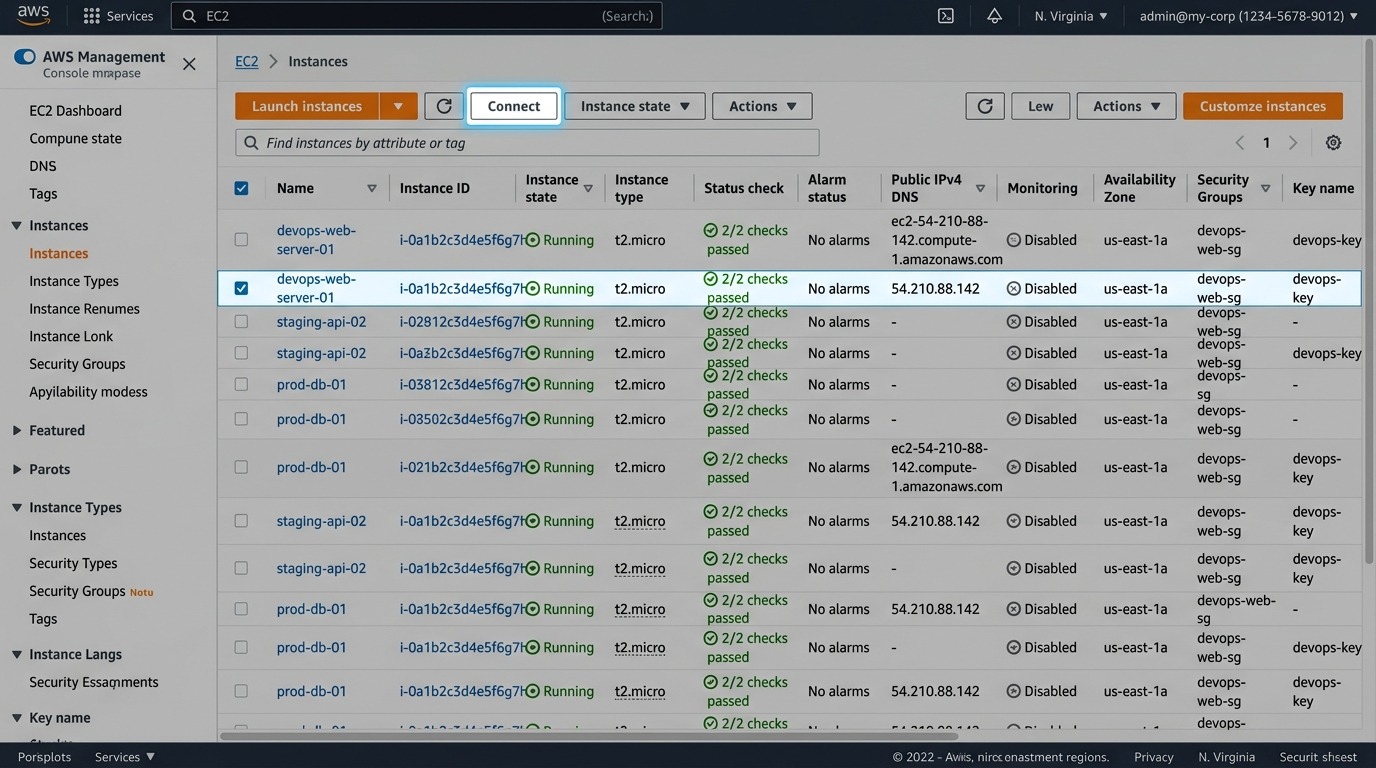
Figure 4: EC2 Instances Dashboard displaying Running state, 2/2 status checks passed, Public IP, and the Connect button.
In the Connect to instance modal, select the EC2 Instance Connect tab, confirm the username (ubuntu), and click the orange Connect button to launch a live browser shell directly inside AWS!
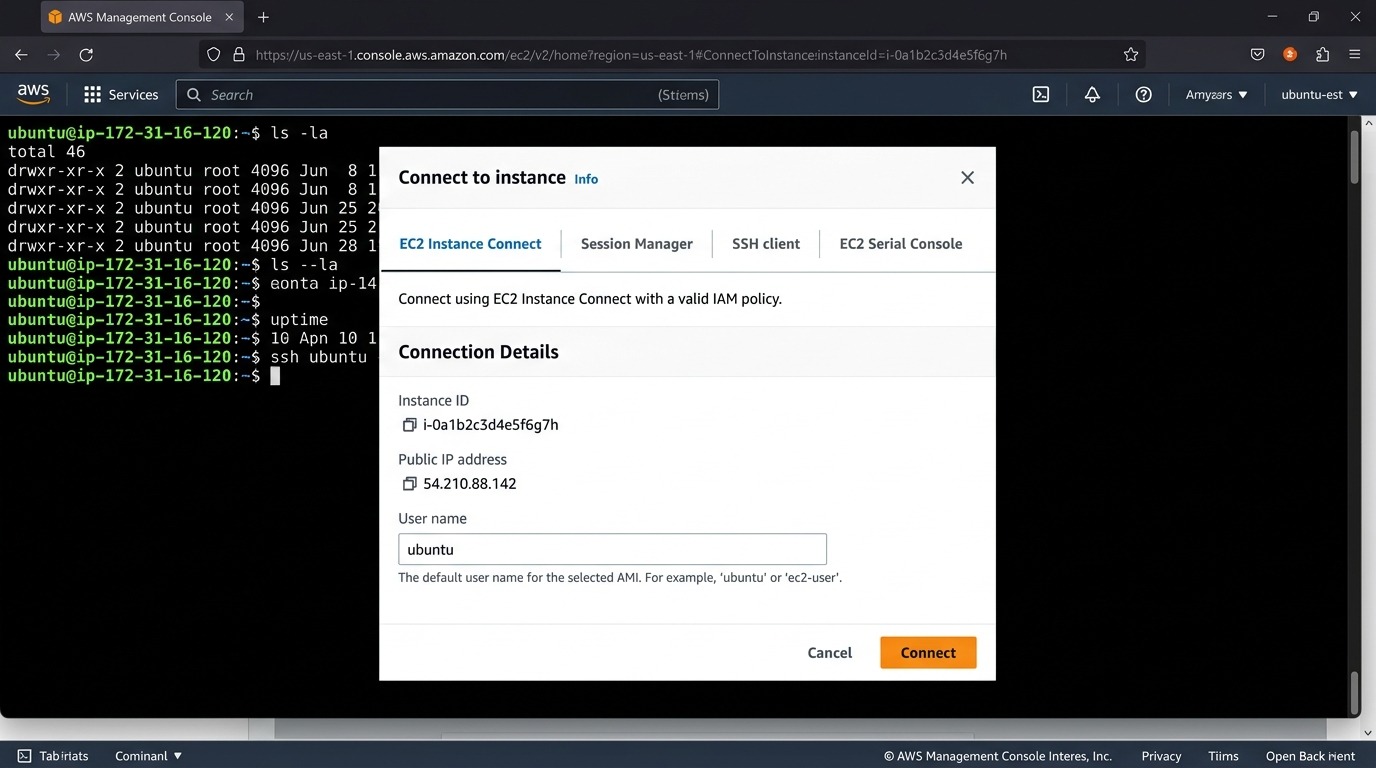
Figure 5: 1-Click EC2 Instance Connect — Connecting directly to the Linux terminal in your browser.
chmod 400 my-devops-key.pemssh -i "my-devops-key.pem" ubuntu@<YOUR-EC2-PUBLIC-IP>
You now know how to provision EC2 instances, configure high-security inbound firewall rules, connect smoothly via EC2 Instance Connect, and manage instance lifecycle states.