There are no items in your cart
Add More
Add More
| Item Details | Price | ||
|---|---|---|---|

How to Submit an Assignment on Google Classroom
A Complete Visual Step-by-Step Guide for Students to Upload Homework, Screenshots, and Project Deliverables
Submitting your assignments correctly on Google Classroom ensures that your instructor receives your screenshots, code files, and project reports on time. Whether you are submitting a Cloud Engineering assignment, Python script, or DevOps lab report, follow this simple 9-step guide with screenshots.
Log in & join your target class
Open top course navigation
Expand assignment details
Open full submission workspace
Click top-right "Your work" button
Select attachment type
Open local file picker dialog
Select screenshots & open
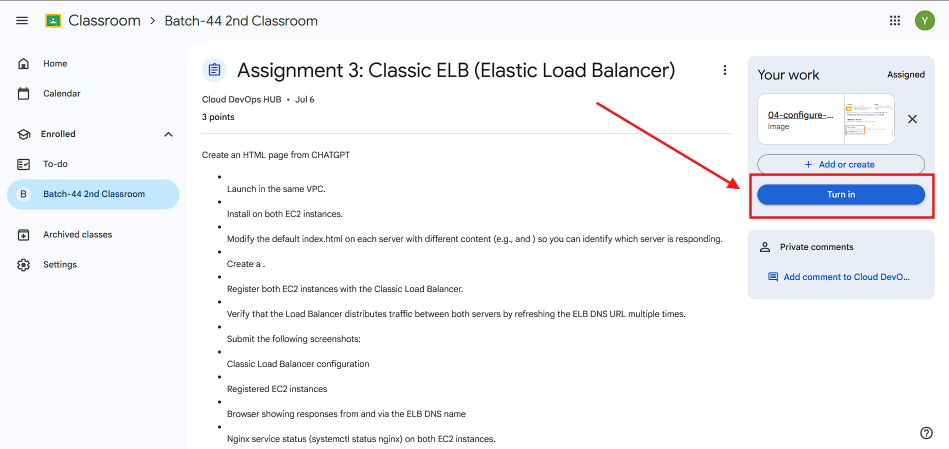
Finalize & submit assignment
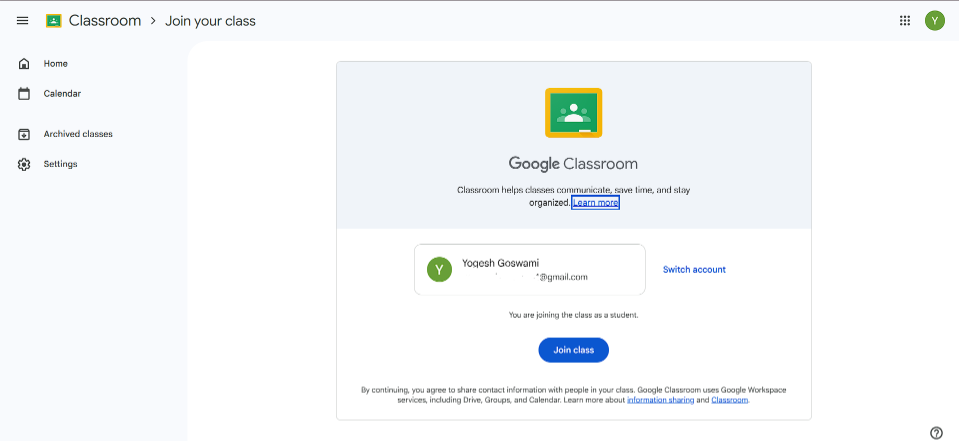
Go to classroom.google.com and sign in with your registered student account (e.g. Gmail or institutional email). If you are joining a new class, verify your logged-in profile and click the blue Join class button.
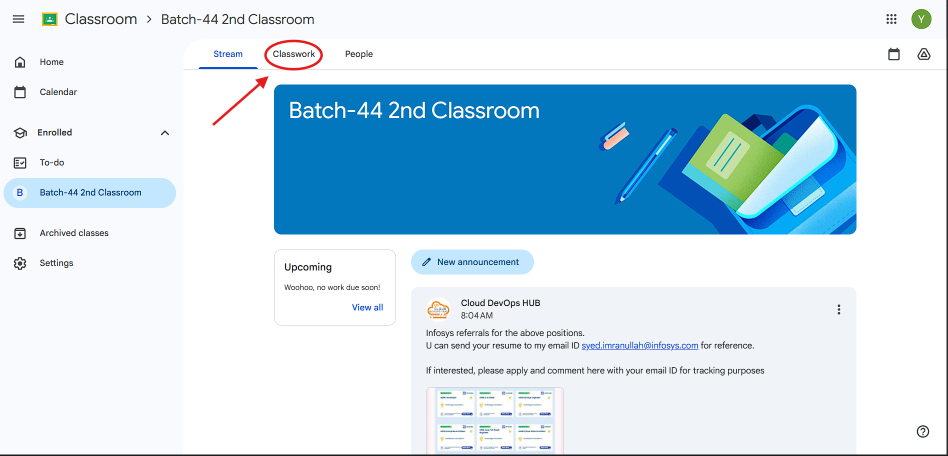
From your main class dashboard (e.g., Batch-44 2nd Classroom), locate the top navigation bar. Click on the Classwork tab situated between Stream and People.
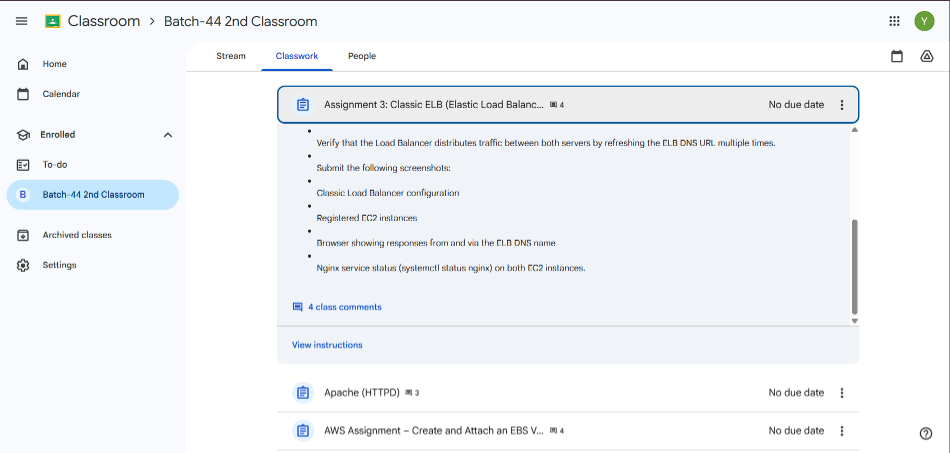
Browse through your listed assignments and click on the assignment you want to submit (for example, Assignment 3: Classic ELB (Elastic Load Balancer)). This will expand the card showing the description, instructions, and required screenshot deliverables.
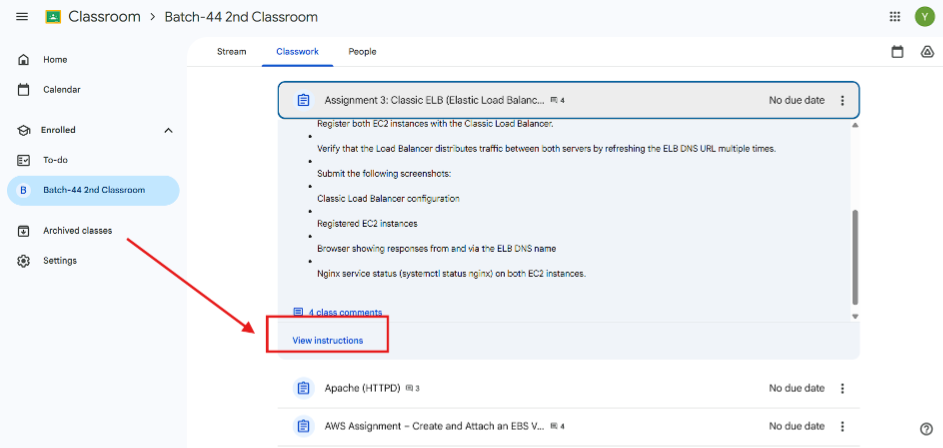
Scroll to the bottom of the expanded assignment box and click on the View instructions link. This will open the dedicated full-screen submission page for this specific assignment.
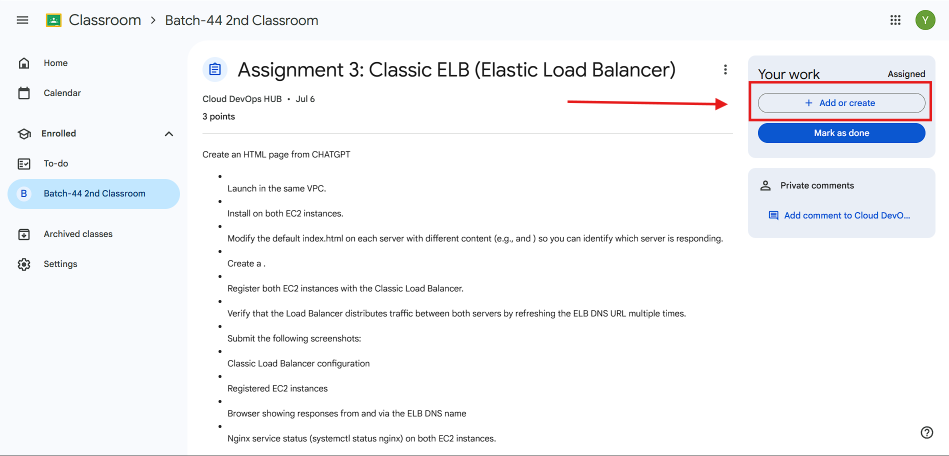
On the right side of the assignment page, you will find the Your work card. Click on the + Add or create button to attach your files.
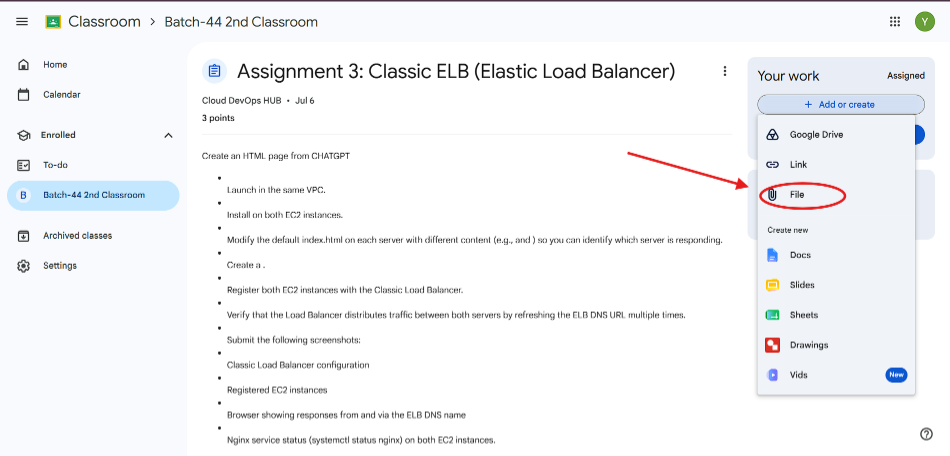
A dropdown menu will pop up with options including Google Drive, Link, File, and Google Docs/Slides/Sheets. Click on File (paperclip icon) to upload files stored on your local computer.
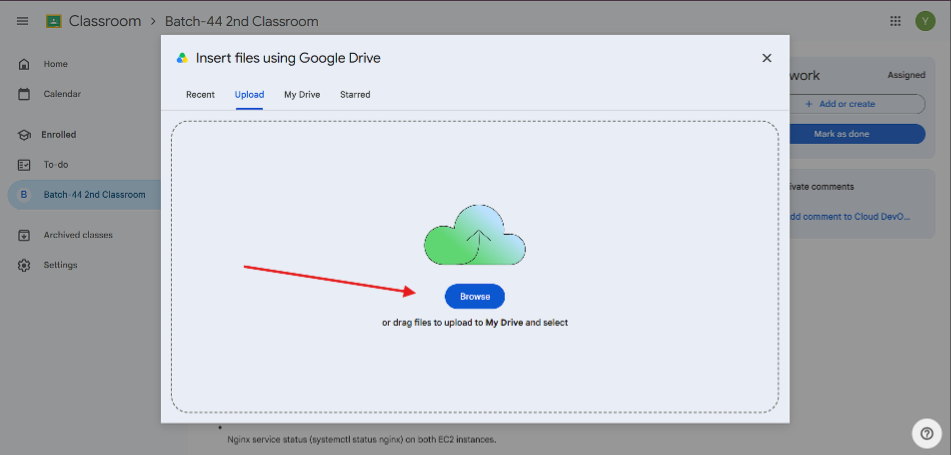
In the popup window labeled "Insert files using Google Drive", make sure the Upload tab is selected, and click the blue Browse button. Alternatively, you can drag and drop your file directly into this modal area.
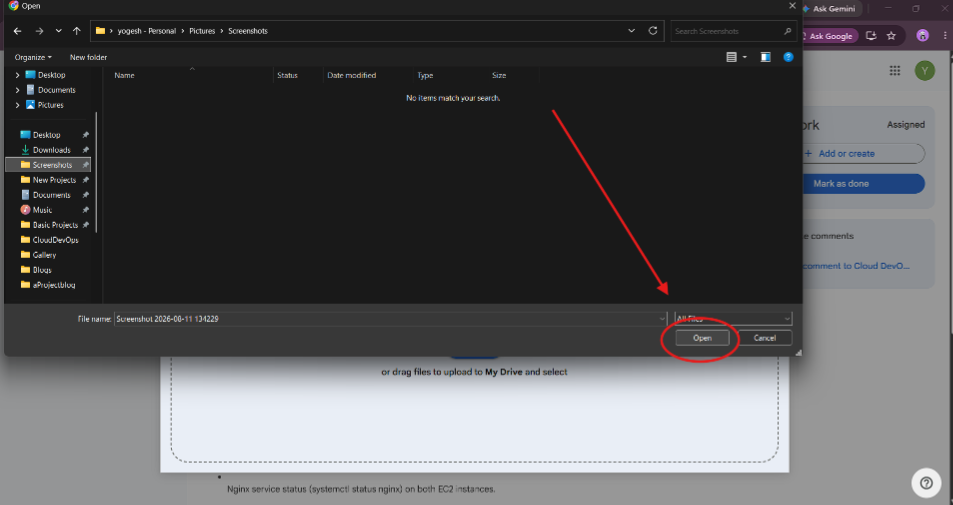
Your computer's File Explorer window will open. Navigate to the folder where your screenshots or project files are saved (e.g. Pictures/Screenshots), select your target file, and click the Open button.
Wait a moment for the file to finish uploading. Once your file is listed under the Your work card, click the solid blue Turn in button. When prompted with a confirmation dialog, click Turn in again to complete your submission.
If your assignment requires multiple screenshots or documents (e.g. AWS configuration screenshot + terminal logs), repeat Steps 5 to 8 to attach all required files before clicking Turn in.
If you made a mistake or forgot to attach a file after turning in, click the Unsubmit button in the "Your work" section, attach the missing file, and click Turn in again before the due date.
Use the Private comments box right below the "Your work" card to send direct notes or questions to your instructor regarding your submission.
Ensure the status in the top right corner of the "Your work" panel changes from Assigned to Turned in. This confirms your submission was successfully received.
Common questions & troubleshooting answers for student assignment submission:
Answer: Check the status text in the top right of the "Your work" box. If it says Turned in (or Turned in late), your submission was received by your instructor.
Answer: Yes! In Step 6, instead of choosing "File", click on Google Drive. You can then pick any document, Google Doc, or image stored in your Drive.
Answer: Click the "X" icon next to the attached file thumbnail under "Your work" to remove it, then follow Steps 5–8 again to upload the correct file.
Answer: Yes, the Google Classroom mobile app (iOS & Android) has the same workflow: open the class ➔ Classwork ➔ select assignment ➔ expand "Your work" ➔ Add attachment ➔ Turn in.