There are no items in your cart
Add More
Add More
| Item Details | Price | ||
|---|---|---|---|

How to Create a Support Case in AWS Support Center
A Comprehensive DevOps Guide: Support Plans, Severity Classifications, Multi-Channel Contact & CLI Case Management
Whether you are encountering unexpected latency on Amazon EC2, debugging an intermittent AWS Lambda execution timeout, or requesting an increase in your regional VPC Elastic IP limits, knowing how to create and manage support cases in AWS Support Center is a fundamental cloud operations capability.
In this visual guide, you will learn the exact steps to submit technical and billing cases, select proper severity levels for target SLAs, choose between Web, Live Chat, and Phone callback, and manage tickets using the AWS CLI.
AWS offers tiered support plans suited for different deployment scales and operational criticality:
| Support Plan | Target Workload | Critical (P1) SLA | Communication Channels |
|---|---|---|---|
| Basic (Free) | Account & Billing, Service Limits, Documentation | N/A (No Tech Support) | Web Console (Billing/Quota only) |
| Developer | Early prototyping and testing | N/A (General guidance < 24h, System impaired < 12h) | Email (1 primary contact, Business hours) |
| Business | Production enterprise workloads | < 1 hour (Production Down) | 24/7 Phone, Chat, & Web (Unlimited contacts) |
| Enterprise On-Ramp | High-scale business-critical workloads | < 30 minutes (24/7) | 24/7 Phone, Chat, Web + Dedicated TAM pool |
| Enterprise | Mission-critical global production footprints | < 15 minutes (24/7) | 24/7 Phone, Chat, Web + Dedicated Technical Account Manager (TAM) |
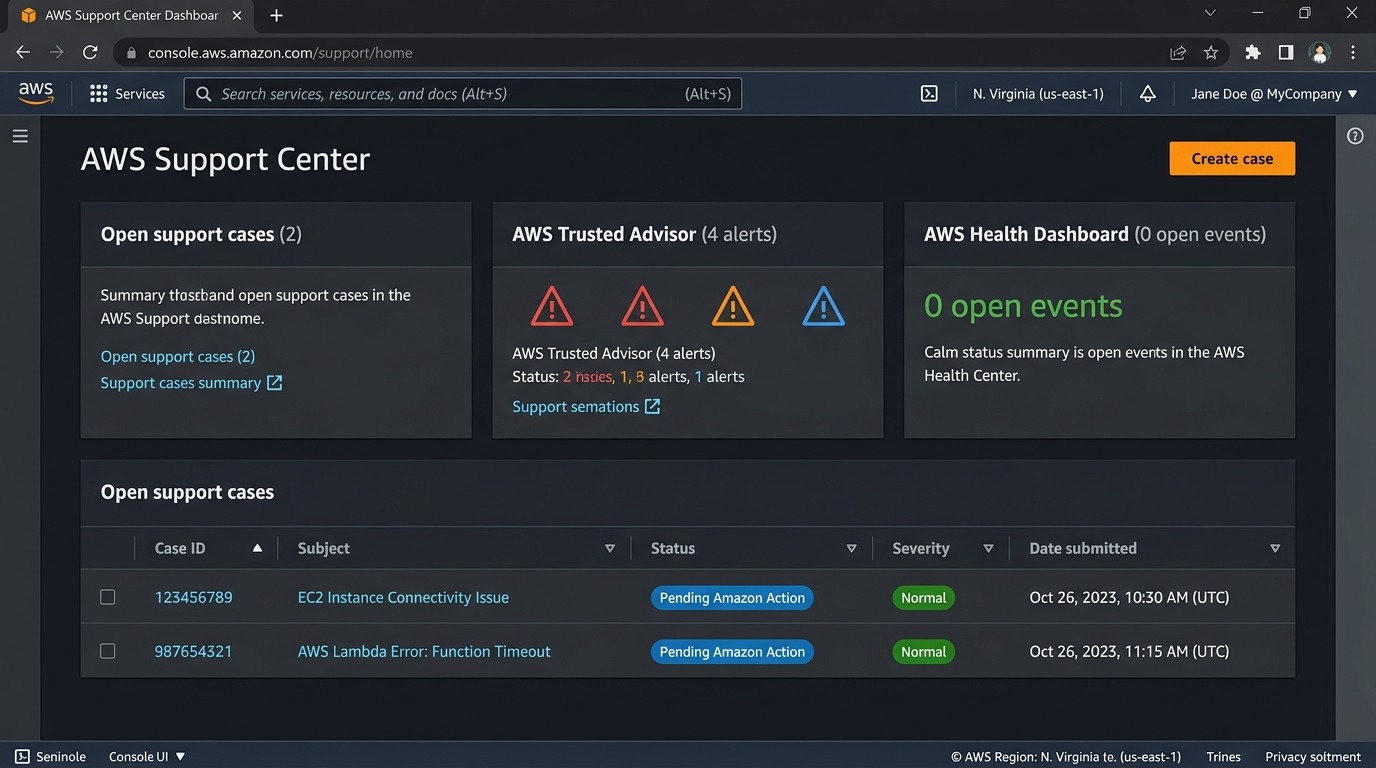
Figure 1: AWS Support Center — Overview dashboard displaying open cases, Trusted Advisor alerts, and the 'Create case' button.
EC2, Lambda, S3, RDS, CloudFront).Linux Instance, Storage / EBS Volumes, Security Groups & Network).i-0abcdef12345678), region, error logs, and detailed timeline.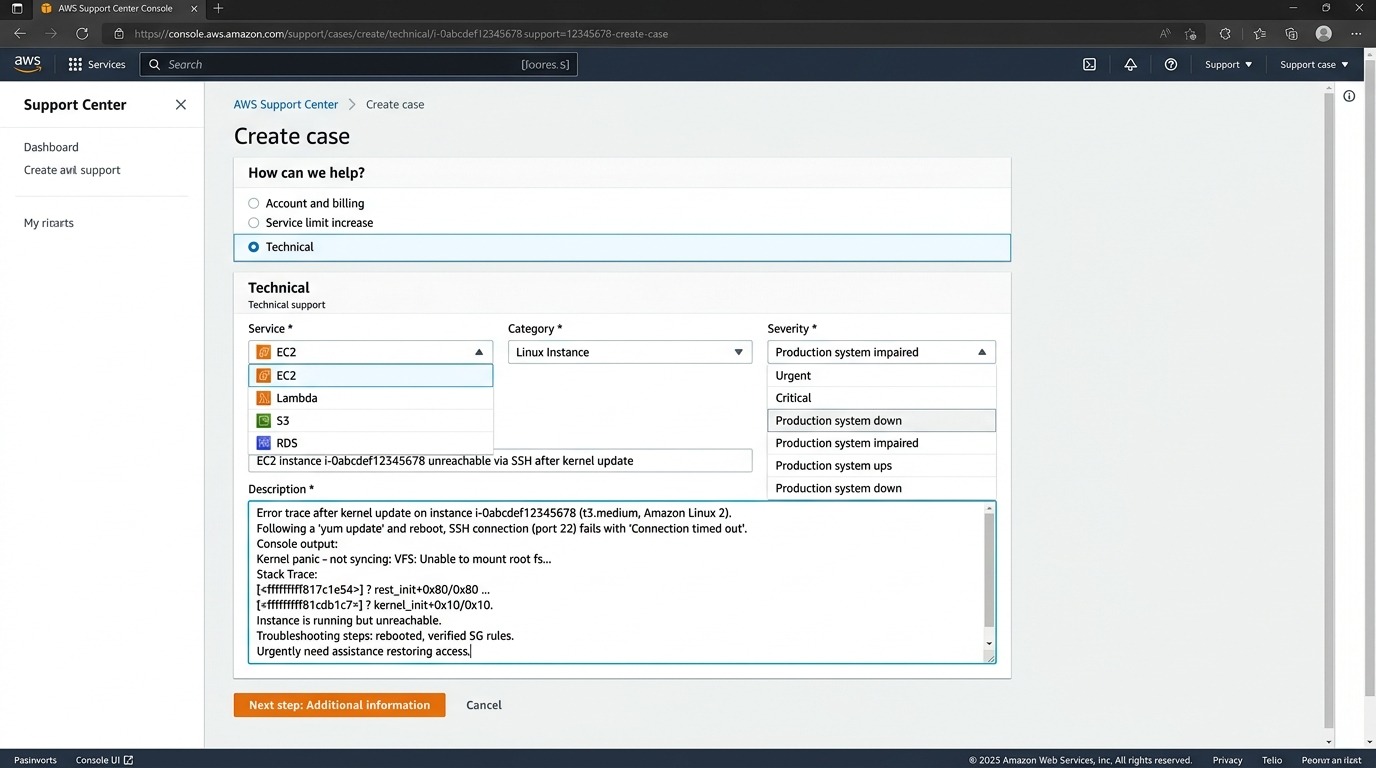
Figure 2: Create Case Wizard — Specifying Service (EC2), Category (Linux Instance), Severity, Subject, and Problem Description.
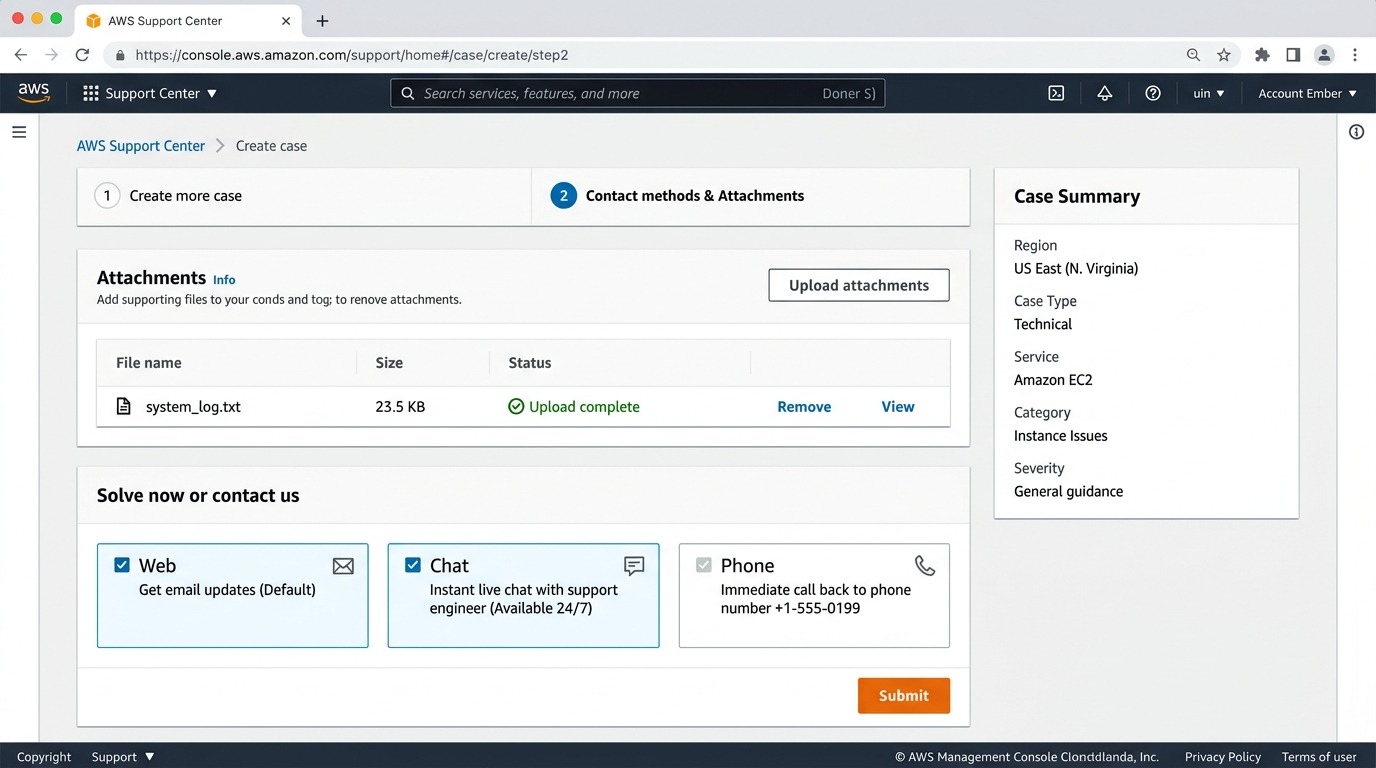
Figure 3: Selecting Contact Methods (Web, Live Chat, Phone Callback) and uploading diagnostic log files.
On Business or Enterprise plans, you can interact with the AWS Support API directly from your terminal or CI/CD pipelines:
# 1. Describe available service codes and categories

aws support describe-services --service-code-list "amazon-elastic-compute-cloud-linux"


# 2. Describe severity levels

aws support describe-severity-levels


# 3. Create a technical support case

aws support create-case \

  --subject "EC2 instance i-0abcdef12345678 unreachable via SSH" \

  --service-code "amazon-elastic-compute-cloud-linux" \

  --severity-code "urgent" \

  --category-code "other" \

  --communication-body "Instance unresponsive after kernel update at 10:15 UTC. Console logs attached." \

  --language "en" \

  --issue-type "technical"


# 4. List open cases

aws support describe-cases --include-resolved false --query "cases[*].[caseId,subject,status,severityCode]" --output table
i-04a1b2c3d4e5f6789 or ARN arn:aws:iam::123456789012:role/MyDevOpsRole.us-east-1 (N. Virginia) or eu-west-1 (Ireland).aws ec2 get-console-output --instance-id i-0abcdef12345678 --output text > console_boot.log
By leveraging AWS Support Center effectively, specifying clear reproduction steps, and utilizing live communication channels, DevOps teams can rapidly resolve complex cloud challenges and keep production environments running with maximum reliability.