How to Create a Budget & Billing Alarm in Azure: Complete Guide (2026)

Control Azure Cloud Costs & Prevent Surprise Bills with Cost Management Budgets and Alerts

Published: July 2026

Whether you are using the Microsoft Azure $200 Free Trial or running production workloads, setting up a Budget Alarm in Azure Cost Management is essential. It ensures you receive instant email notifications before your account spend exceeds your planned allocation.

In this detailed July 2026 step-by-step tutorial, we will cover how to navigate Azure Cost Management, configure a spending budget, set alert percentage thresholds (actual & forecasted), and assign email recipients or Action Groups.

Why Create an Azure Budget Alert?

  • Prevent Unexpected Charges: Receive automated emails when costs reach 50%, 80%, or 100% of your target budget.
  • Forecasted Spending Alerts: Azure alerts you when your current burn rate is predicted to exceed your budget by the end of the billing period.
  • Automation Capabilities: Connect Azure Action Groups to runbooks or Azure Functions to automatically stop resources when budgets are breached.

Prerequisites & Role Requirements

Before creating a budget, make sure your Azure user account has sufficient permissions:

  • You need Owner, Contributor, Cost Management Contributor, or Billing Reader role on your Subscription or Resource Group.
  • Access to the Azure Portal.

Step-by-Step: Creating an Azure Budget & Billing Alarm

1 Open Azure Portal & Search "Cost Management + Billing"

Log in to the Azure Portal. In the top search bar, search for Cost Management + Billing or Budgets and select it.
Azure Cost Management and Billing Navigation

2 Click "+ Add" to Create a New Budget

Under the Cost Management section in the left sidebar, click Budgets. Then click the + Add button on the top action bar.
Add Budget in Azure Cost Management

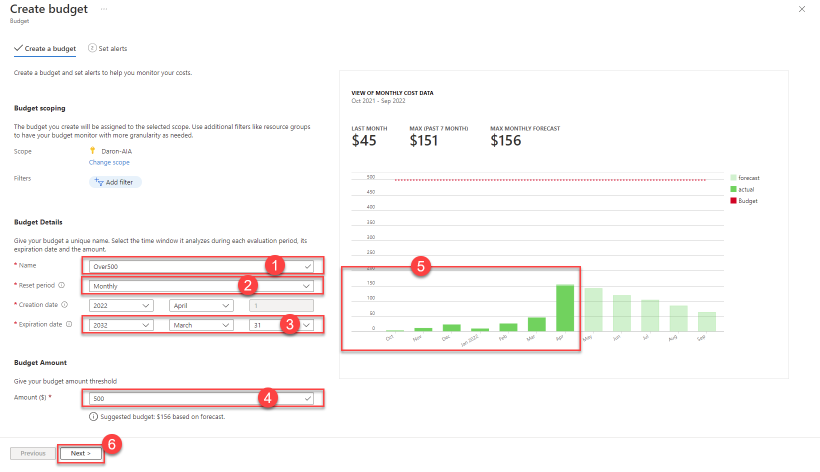
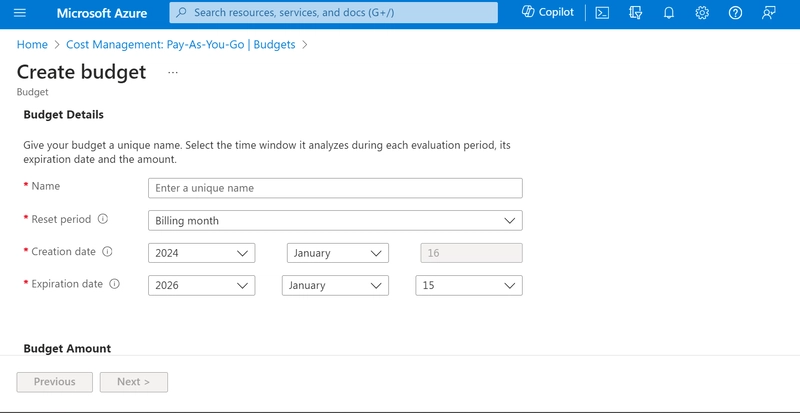
3 Define Budget Scope, Name & Target Amount ($)

In the Create budget wizard under the Budget details tab, configure the following settings:

  • Scope: Confirm your active Subscription or select a specific Resource Group.
  • Name: Type a unique budget name (e.g., Monthly-DevOps-Azure-Budget).
  • Reset period: Select Monthly (or Quarterly/Billing Month/Annually).
  • Creation date & Expiration date: Keep defaults or set your desired time window.
  • Amount: Enter your limit in USD or local currency (e.g., 10.00 for $10 USD).
Set Azure Budget Name Period and Amount

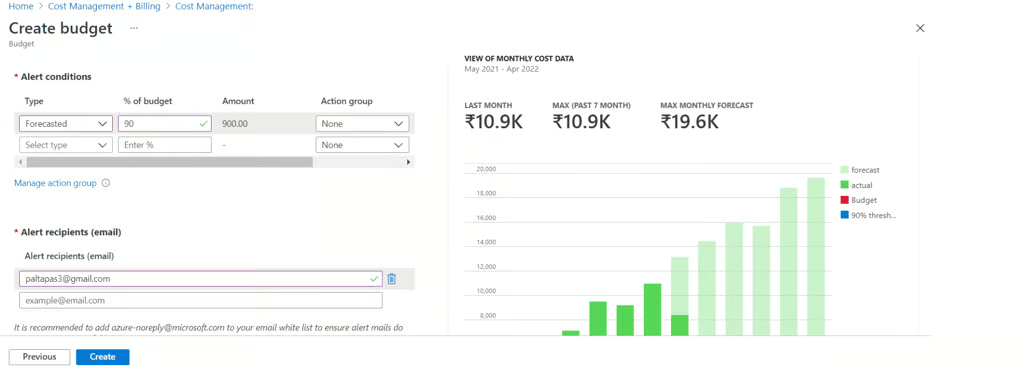
4 Configure Alert Thresholds (Actual vs. Forecasted)

Click Next to move to the Set alerts tab. Add your threshold conditions:

  • Alert 1 (Actual Cost): Set Alert type to Actual and % of budget to 50 ($5).
  • Alert 2 (Actual Cost): Click + Add alert rule, set Alert type to Actual and % of budget to 80 ($8).
  • Alert 3 (Forecasted Overrun): Click + Add alert rule, set Alert type to Forecasted and % of budget to 100 ($10).
Configure Azure Budget Alert Percentage Thresholds

5 Add Notification Email Recipients & Action Groups

In the notification settings area at the bottom of the page:
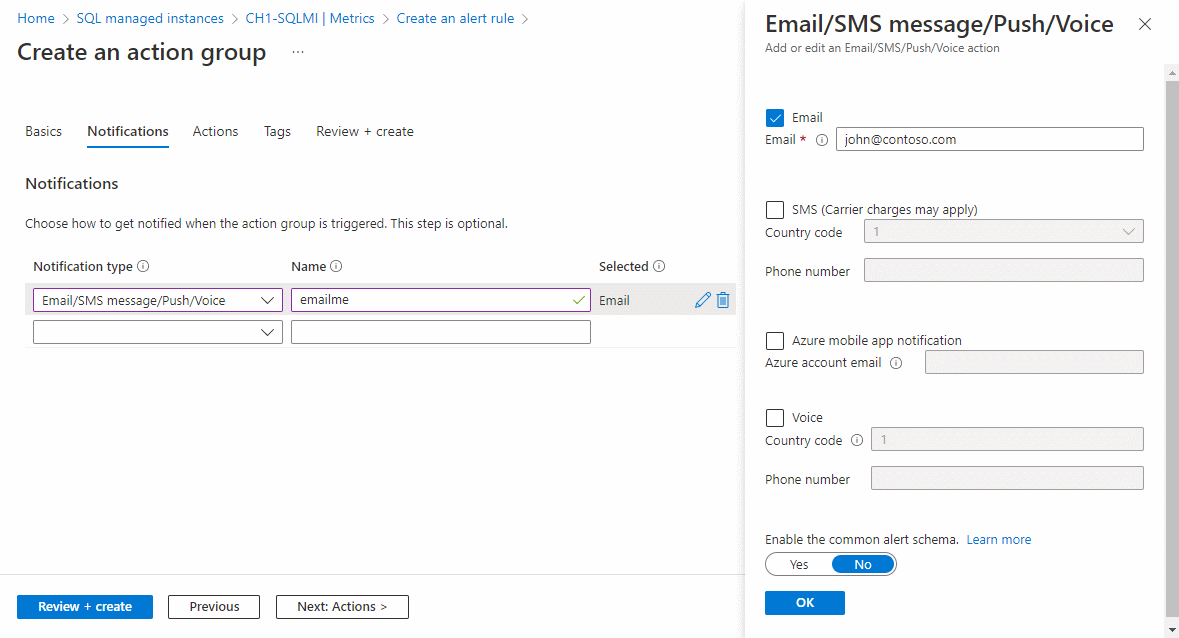
  • Email recipients: Type your email address (separate multiple emails with commas).
  • Language: Select your preferred notification language.
  • Action group (Optional): Select or create an Azure Monitor Action Group if you want to trigger automated runbooks or webhooks.
Azure Action Group Email Notification Settings

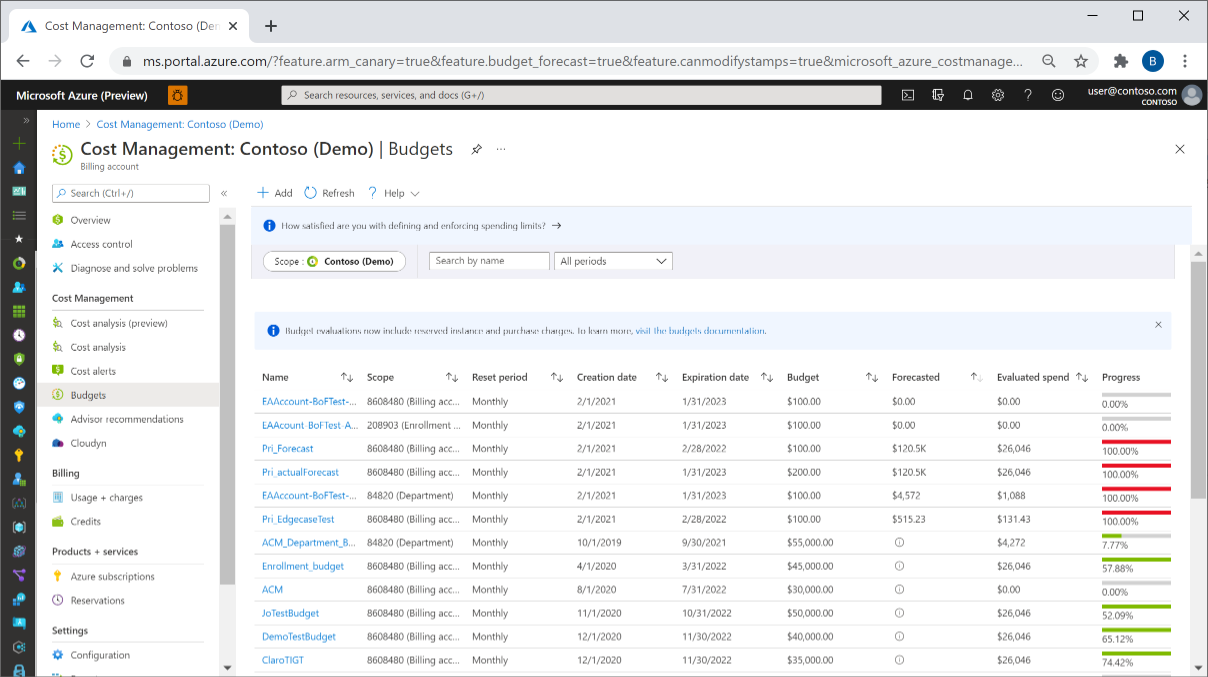
6 Review & Create Budget

Click Create to activate your budget. You will be redirected to the Budgets dashboard, where progress bars display actual spending against your budget limit in real time.
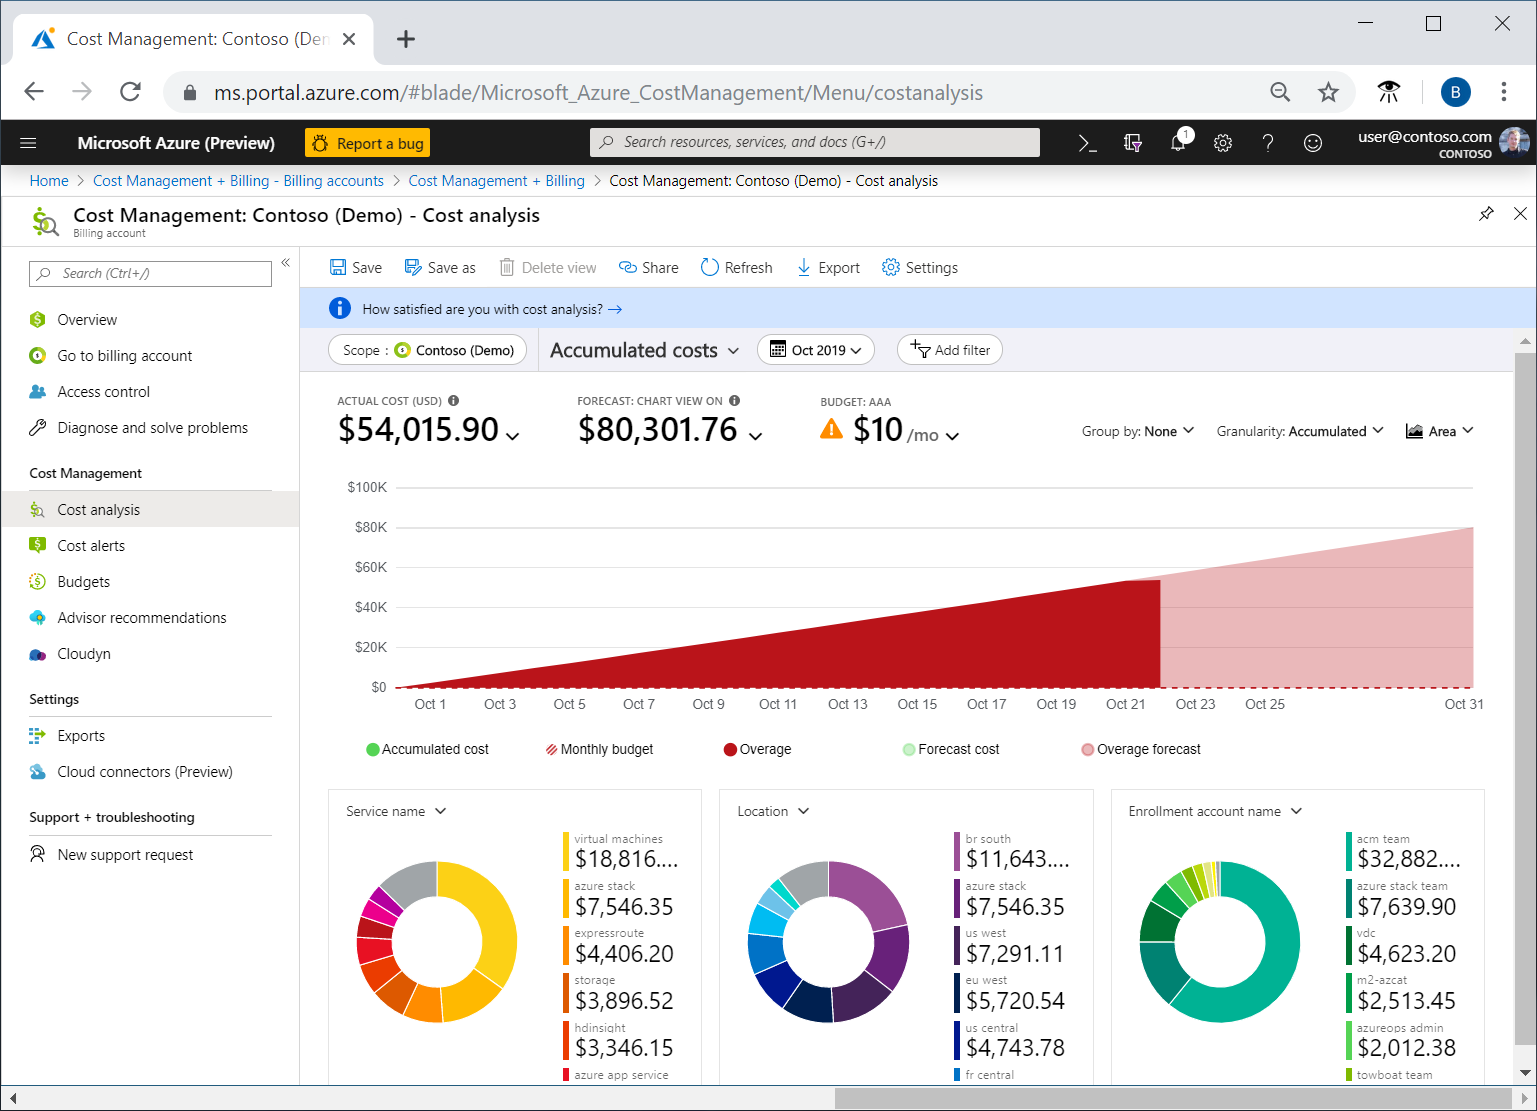
Azure Cost Analysis and Active Budgets Dashboard

Important Azure Cost Management Tips

Deallocate Unused VMs: Stopping a Virtual Machine from inside the guest OS keeps the VM in a Stopped state, which still incurs compute charges. Always stop VMs from the Azure Portal so their status changes to Stopped (Deallocated), pausing compute billing!

👤
Vikas Ratnawat  From CloudDevOpsHub