There are no items in your cart
Add More
Add More
| Item Details | Price | ||
|---|---|---|---|

Get Started with AWS: Creating a Free Tier Account
Follow this comprehensive guide to create your AWS free tier account and get hands-on experience
Published: July 3, 2026
This post covers the AWS Free Tier Account Overview. Amazon Web Services (AWS) is providing Free Tier accounts to new subscribers to get hands-on experience with all the AWS cloud services.
In this AWS Free Tier account, Amazon is giving a number of different services with some limitations to get hands-on practice and more knowledge on AWS Cloud services, as well as regular business use. The AWS Free Tier is mainly designed to give hands-on experience with AWS Cloud Services for customers free of cost for 6 Months. With the AWS Free Tier account, all the services offered have a limit on what we can use without being charged.
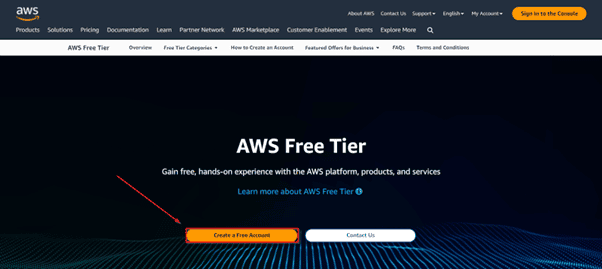
First, open your web browser and navigate to the AWS Free Tier Page.
On the middle click of Create a Free Account.
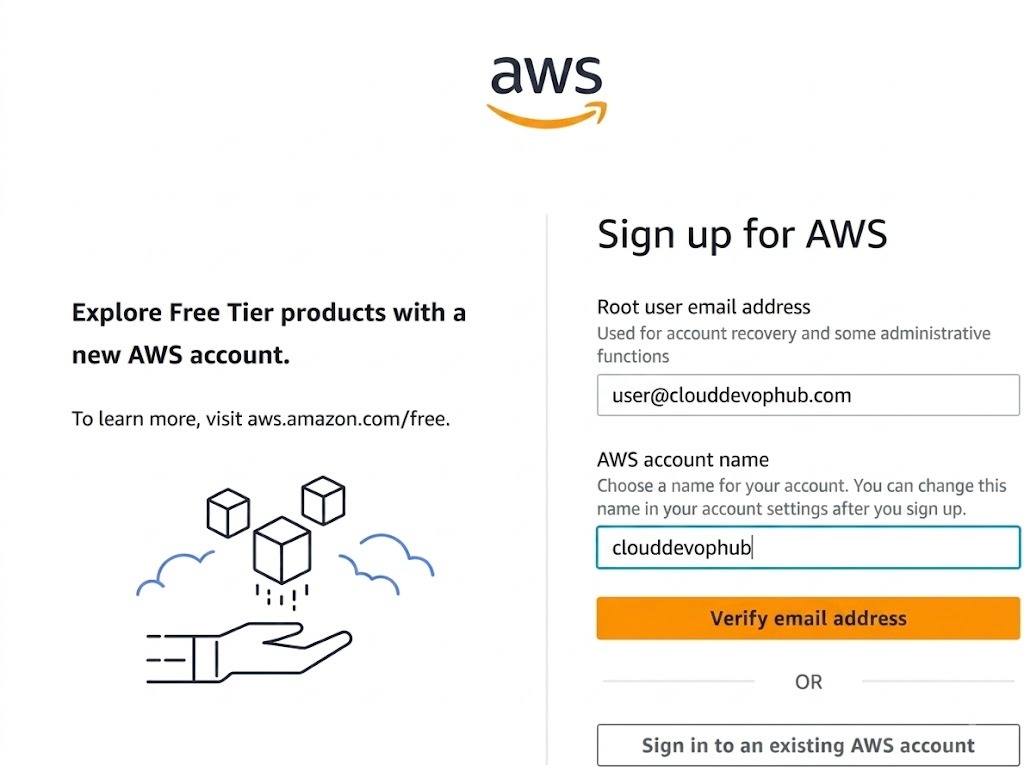
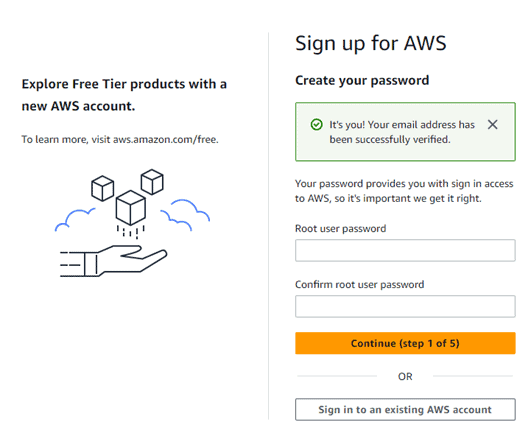
Provide password: Provide the details that you want to use to log in to your AWS account, and click on Continue.
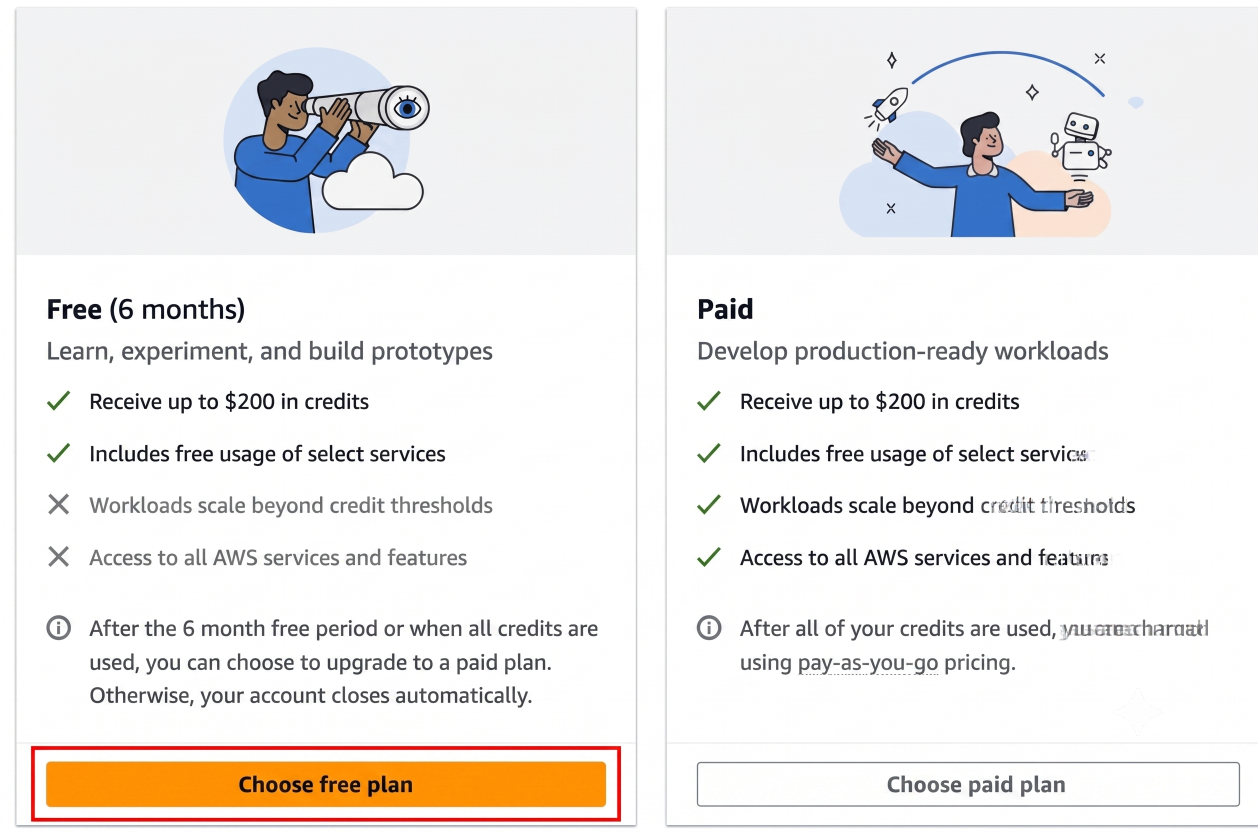
AWS offers two plans for new customers: the Free Plan and the Paid Plan. Since we will be building production-ready workloads and using AI/ML services like SageMaker, OpenSearch, and other advanced services, we recommend selecting the Paid Plan.
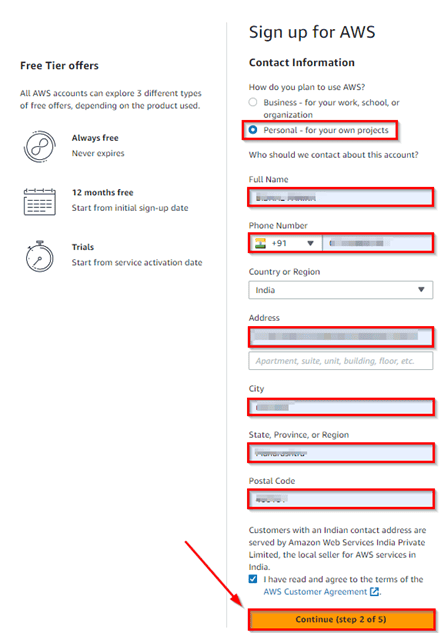
Select your AWS type (Professional/ Personal). Fill in the correct information to validate your account if you're going to create a personal use account, then click on "Personal Account"; otherwise, use "Company Account", accept the Terms and Conditions, and then click on Create Account and Continue.
Note: Make sure to provide proper contact details and mobile number to get the Verification code from AWS.
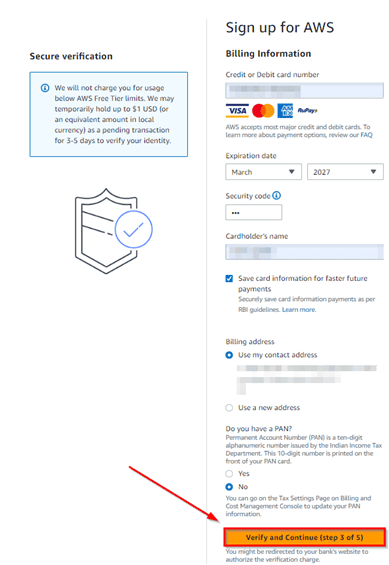
In this step, you must fill in your credit card /Debit Card info and billing address and click on Secure Submit.
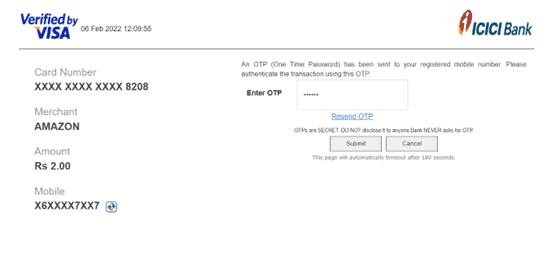
In this step, it will take you to the payment gateway to validate your payment information, and for your credit card verification, Amazon will charge the minimum price based on your Country.
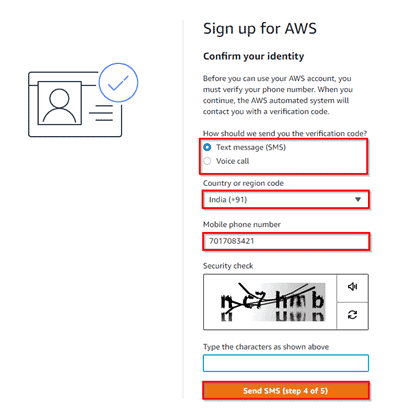
Here, you will be taken to an identity verification page that will already have your phone number, so you just have to select either "Text message or Voice call." Provide a valid phone number, solve the captcha, and then click on Send SMS or Call Me Now (depending upon your selection).
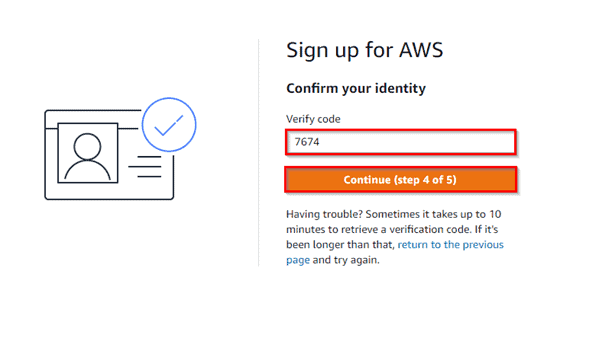
After clicking on Send SMS or Call me Now, you will immediately receive a call or SMS from Amazon for a verification code. Enter your code, then click on Verify Code.
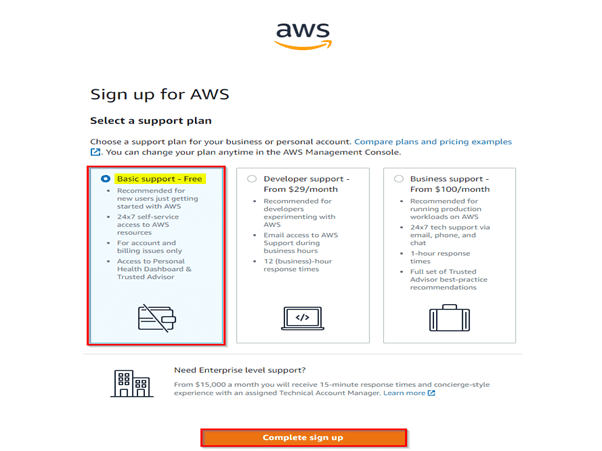
AWS support offers a selection of plans to meet your business needs. Select your suitable plan, then click continue.
Note: All customers receive free basic support.
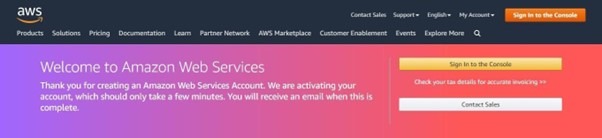
Once you have completed all the above steps and processes. You'll get the confirmation page below. Now your account will be processed for activation. It may take somewhere between 30 minutes and 1 hour for you to receive an email confirmation that your Amazon Cloud Services account has been activated.
Note: Make Sure you log in as the root user in your AWS Account.
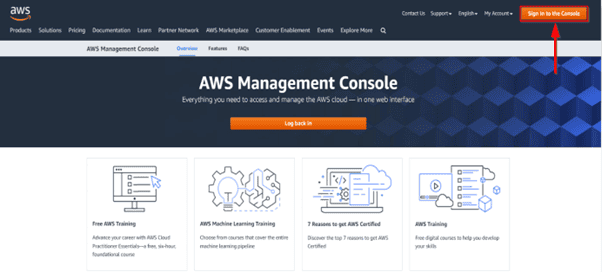
Open your web browser, navigate to https://aws.amazon.com/console/, and click on Sign In to the console.
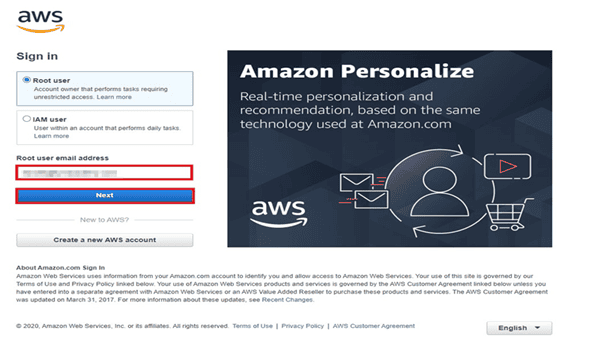
Enter the username that you have chosen while creating the account and click on Next.
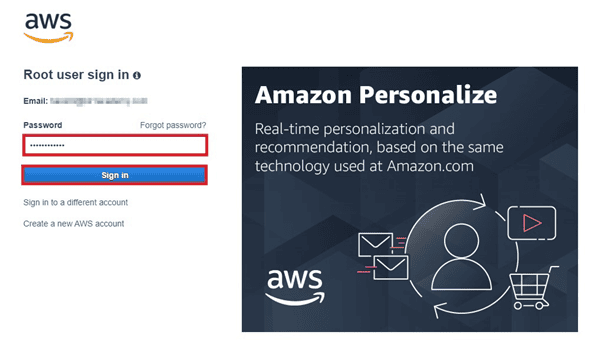
Enter the password associated with the user and then click on Sign in.
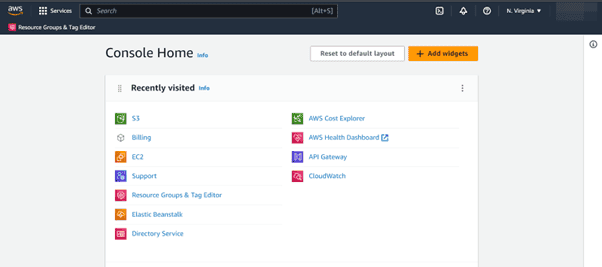
You can see the home screen below after you log in.
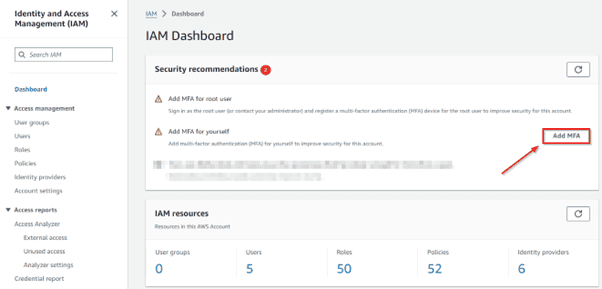
Note: For security reasons, you need to add MFA, which provides an extra layer of security.
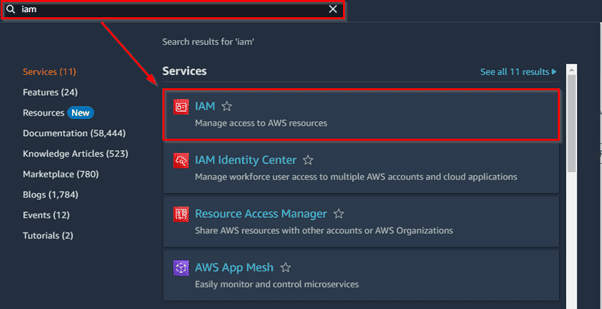
In the IAM dashboard, you will see the Add MFA button. Click on it.
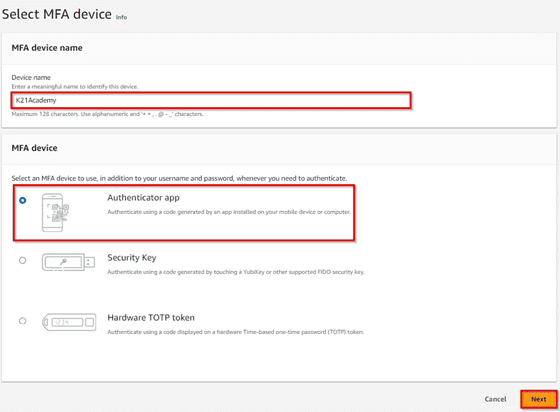
Provide the MFA device name and then select the MFA device as the Authenticator app. Click on Next.
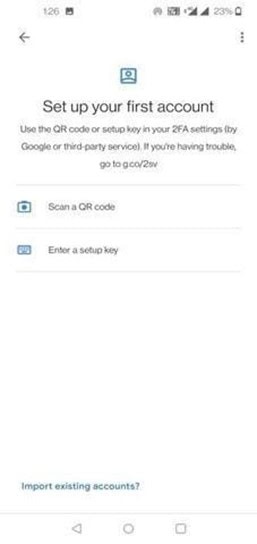
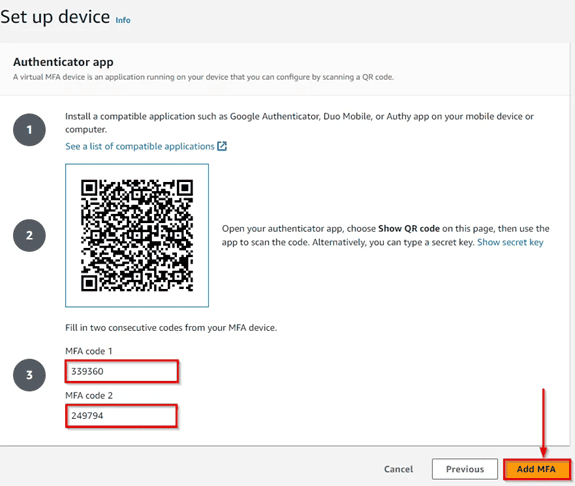
Install Google Authenticator on your phone (Android or iOS). Open the app, click on Get Started, and scan the QR code.
Click on Show QR Code in AWS Console and scan the code. Then enter the code from your Phone into MFA code 1 and MFA code 2. Click on the Add MFA button.
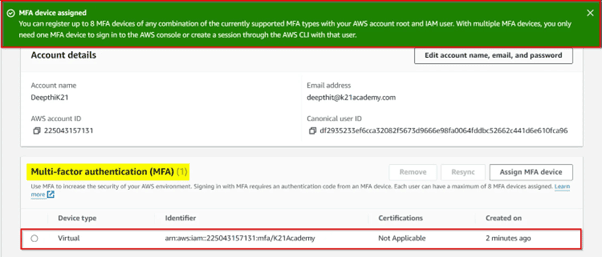
Now you will see that the device has been added for MFA. You have successfully activated MFA on your root account settings.
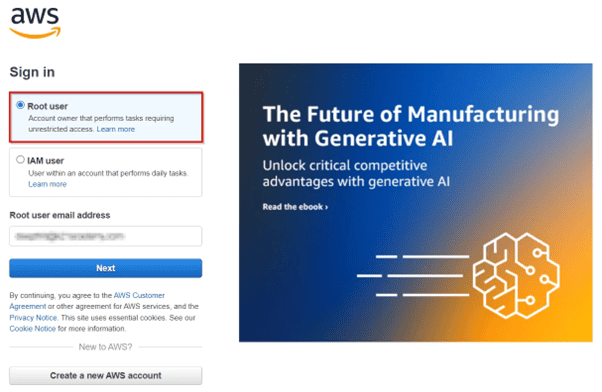
Step 1: Open your AWS console login page and click on Root User, then enter your email ID and click on Next.
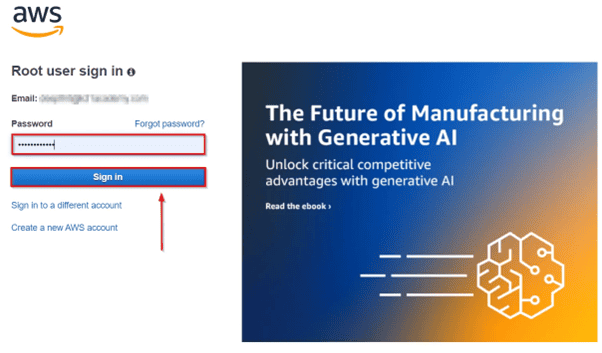
Step 2: Enter your Password corresponding to the Email address.
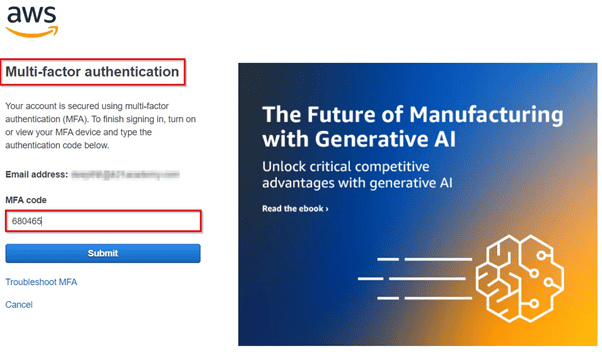
Step 3: Use your Google Authenticator Application on mobile and enter the MFA code in the AWS Console.