There are no items in your cart
Add More
Add More
| Item Details | Price | ||
|---|---|---|---|

How to Create Your First Virtual Machine on Microsoft Azure & Master Complete Troubleshooting
End-to-End Visual Guide: Resource Groups, Sizing, Network Security Groups (NSGs), SSH Connectivity & Step-by-Step Fixes if VM is Not Working
Microsoft Azure Virtual Machines (VMs) offer on-demand, scalable cloud computing resources with full administrative control over the guest OS. Whether running enterprise Linux distributions, Windows Servers, or Kubernetes worker nodes, knowing how to properly provision and troubleshoot Azure VMs is an indispensable DevOps skill.
In this guide, you will learn how to create your first Azure VM from scratch, configure Network Security Groups (NSGs) with priority rules, connect seamlessly, and diagnose exactly what to do if your VM is unresponsive, failed, or rejecting connections.
Standard_B1s or Standard_B2s.Virtual machines and select it.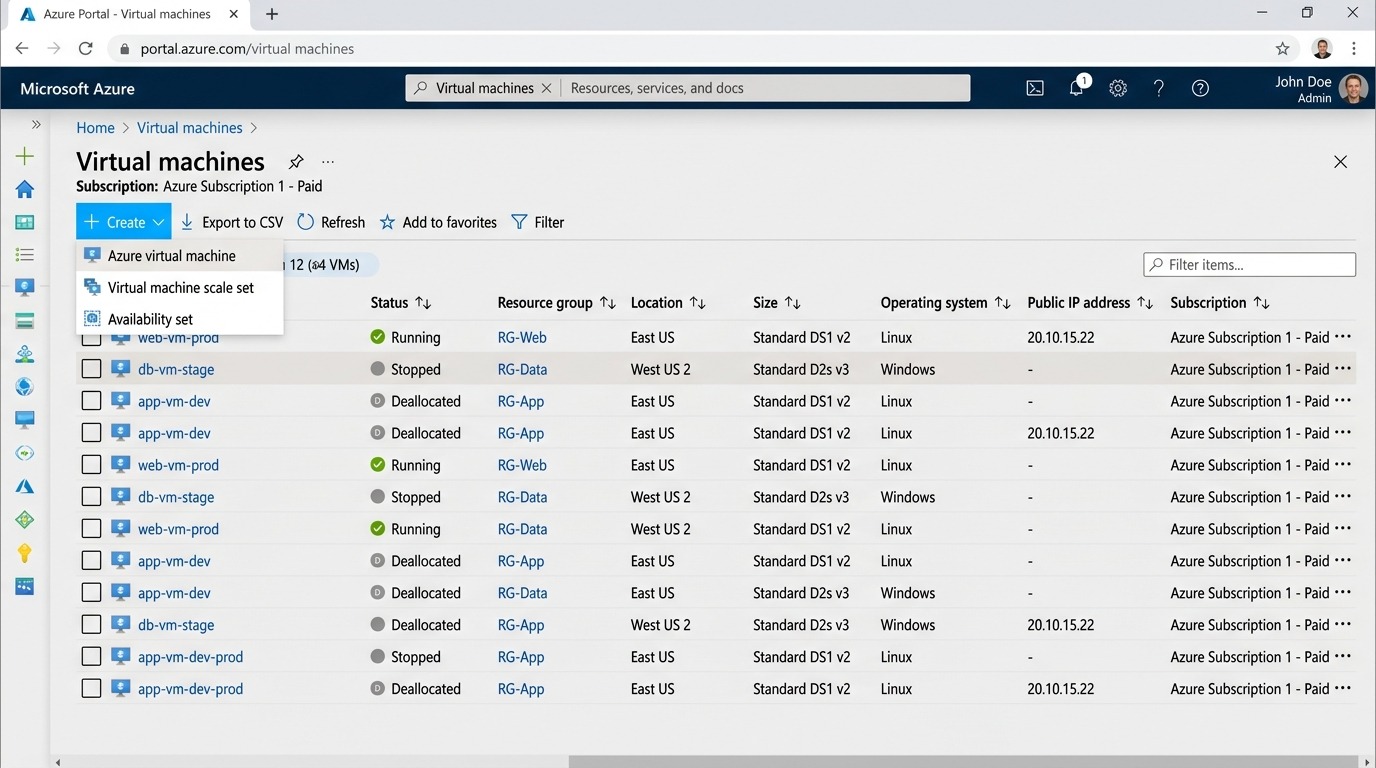
Figure 1: Azure Portal — Navigating to Virtual Machines and clicking '+ Create > Azure virtual machine'.
Pay-As-You-Go).rg-devops-training.vm-devops-web-01.(US) East US or a datacenter closest to you.Ubuntu Server 22.04 LTS - x64 Gen2.Standard_B1s (1 vcpu, 1 GiB memory) — Free Tier eligible.SSH public key and username azureuser.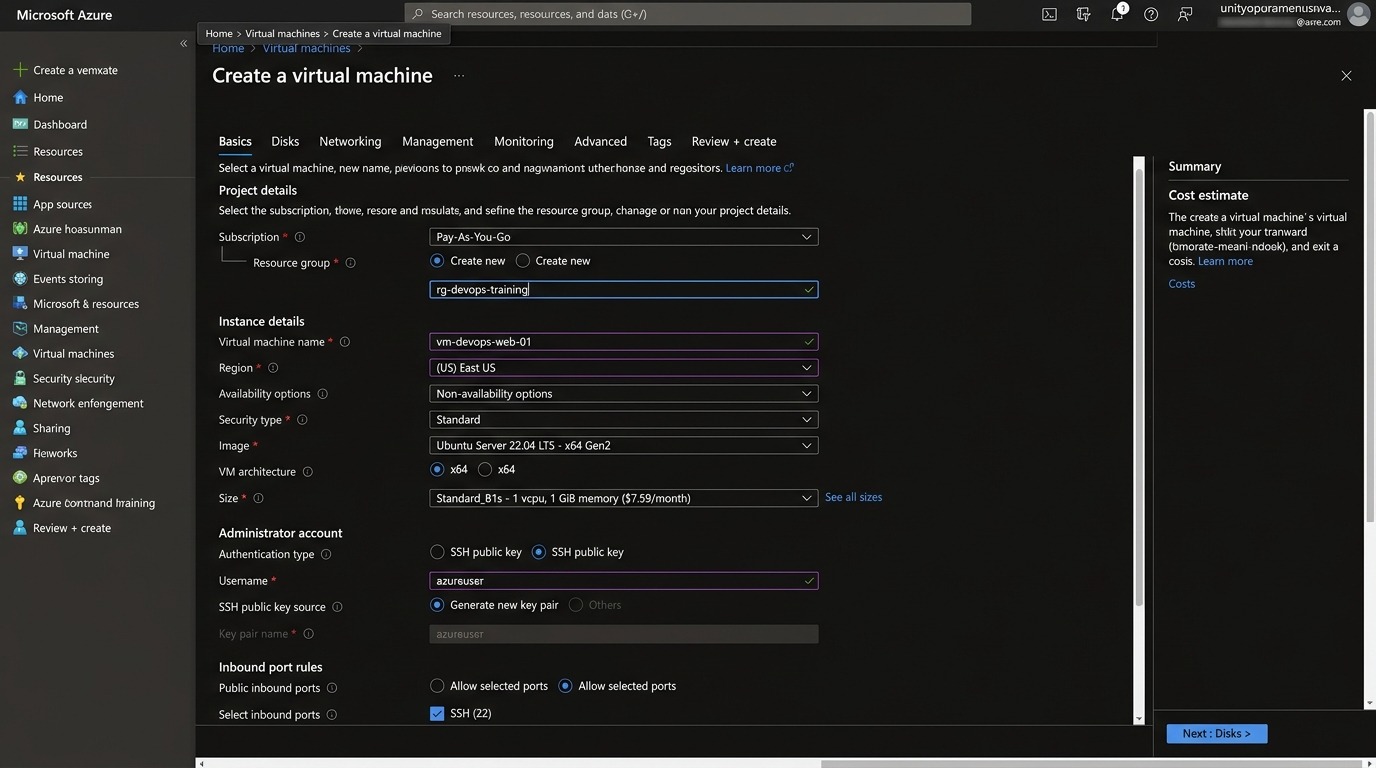
Figure 2: Setting Resource Group 'rg-devops-training', VM Name, Ubuntu 22.04 LTS Image, and Standard_B1s Size.
A Network Security Group (NSG) contains security rules that allow or deny network traffic to your Azure Virtual Machine. In Azure, NSG rules are evaluated in order of priority from lowest numerical number (100) to highest (4096).
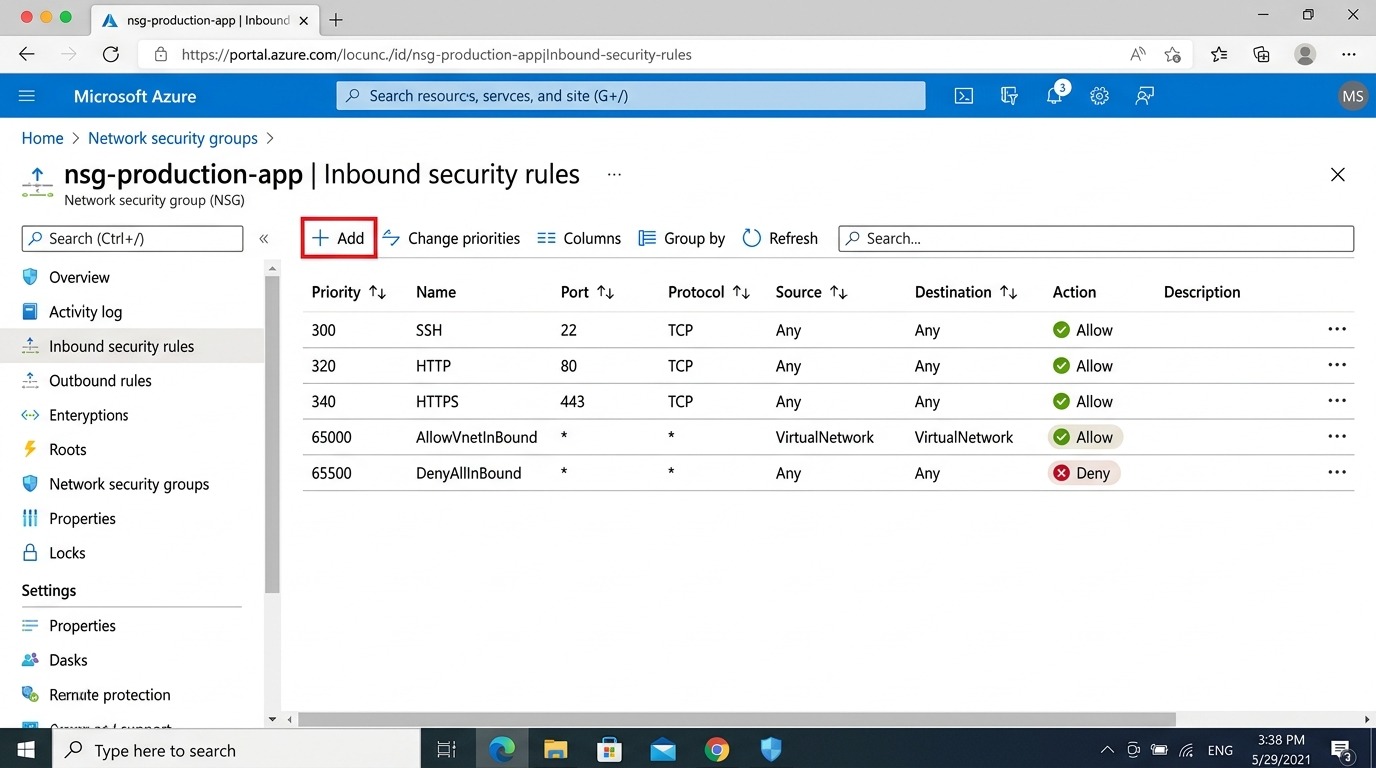
Figure 3: Azure Network Security Group (NSG) — Inbound security rules configured for SSH (Port 22), HTTP (Port 80), and HTTPS (Port 443).
| Priority | Name | Port | Protocol | Source | Action |
|---|---|---|---|---|---|
| 300 | SSH | 22 | TCP | Any / My IP | Allow |
| 320 | HTTP | 80 | TCP | Any | Allow |
| 340 | HTTPS | 443 | TCP | Any | Allow |
| 65000 | AllowVnetInBound | Any | Any | VirtualNetwork | Allow (Default) |
| 65500 | DenyAllInBound | Any | Any | Any | Deny (Default) |
vm-devops-web-01_key.pem).
Figure 4: Azure VM Overview blade displaying Public IP address and Status: Running.
chmod 400 vm-devops-web-01_key.pemssh -i vm-devops-web-01_key.pem azureuser@<YOUR-AZURE-PUBLIC-IP>
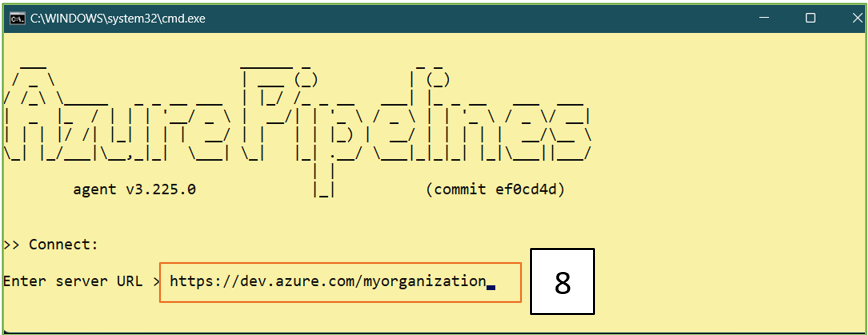
Figure 5: Successful SSH connection to the Azure Virtual Machine.
If you cannot connect via SSH or your web server is unreachable, follow this proven troubleshooting flowchart:
Go to your VM Overview blade. Check the Status:
When an OS crashes or is stuck in a kernel panic, standard networking goes down. Azure provides Boot Diagnostics to view an out-of-band screenshot of the virtual monitor without needing network access!
fsck) prompt, the issue is within the OS filesystem rather than the Azure network.If SSH is blocked, use Azure's Run Command or Serial Console to execute bash commands directly on the VM via the Azure Agent:
.png)
Figure 6: Using Azure Run Command to troubleshoot and restart SSH services remotely without network access.
sudo systemctl restart sshsudo ufw allow 22/tcp
A higher priority Deny rule may be silently blocking your connections:
If SSH keys were lost or corrupted, Azure provides a 1-click built-in repair tool:
azureuser), paste a newly generated SSH public key, and click Update. Azure VM Agent will repair ~/.ssh/authorized_keys and restart the SSH service.If the physical hardware blade in the Azure data center is experiencing underlying hypervisor degradation:
Never leave a VM running accidentally overnight:
rg-devops-training) to instantly wipe the VM, disk, public IP, and NSG simultaneously.You now possess end-to-end expertise in provisioning Azure Virtual Machines, tuning Network Security Groups, and executing advanced recovery diagnostics with Boot Diagnostics, Serial Console, and Host Redeployment.